


When it comes to engraving photos, the question often arises: "Can photos be laser engraved?" The clear answer is: Absolutely!
Photo laser engraving, similar to image laser engraving and image graphic laser engraving, is a highly developed technique used to engrave portraits, headshots or images onto material surfaces such as wood, metal or glass.
In this guide, we offer a comprehensive overview of laser photogravure: how the process works on different materials, which laser machines are suitable, and how you can create your own laser-engraved artwork in a few simple steps.

This article contains:
Part 1: What is photo laser engraving and which machine is suitable for it?
1.1 How do you convert an image into a laser engraving?
To laser engrave photos, the laser engraver directs a focused laser beam onto the surface of the material. The beam generates high energy, which locally heats and partially vaporizes the material. This removes a thin layer of material – and this is precisely how the desired engraved image is created.
Laser photo engraving is often the better choice compared to other engraving methods. It allows for convenient, precise, and extremely durable engraving on a wide variety of materials and delivers consistently high-quality results, even with intricate designs.
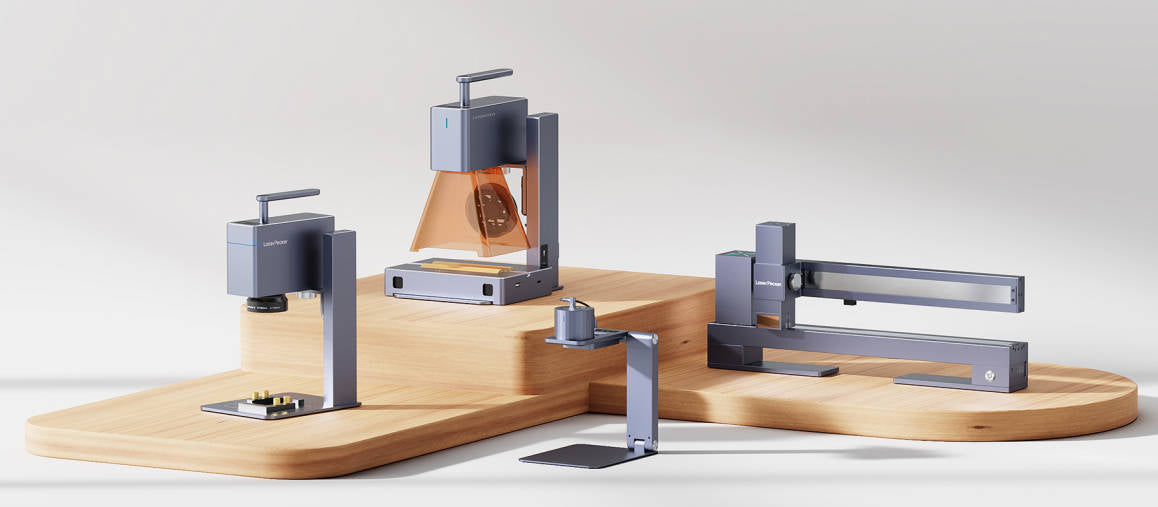
1.2 Photo laser engraving machine
For photo laser engraving you will need a Laser engraving machine . It is indispensable for the entire engraving process, as it significantly simplifies the work and ensures precise and long-lasting results.
Given the large number of laser machines available, many people ask themselves: Which laser is best suited for photo engraving? or Which laser machine is ideal for engraving photos?
Compared to CO₂ and fiber lasers, some doubt whether diode lasers can reliably engrave photos. But don't worry – photos can be engraved very well with a diode laser.
Diode lasers are particularly suitable for home use or smaller projects. If you value mobility, ease of use, and cost-efficiency in photo engraving, then these lasers are a good choice. Diode lasers are the better and more practical choice.
1.3 Which material is best suited for engraving photos?
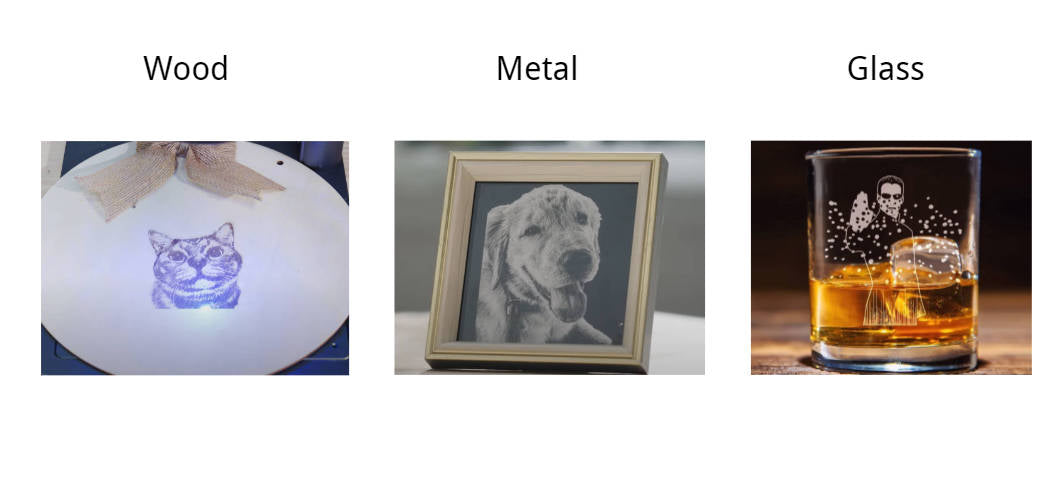
The best material for photo engraving depends on the desired look and durability. Here are three particularly recommended materials for laser photo engraving:
Metal offers crisp details and high resistance – ideal for laser-engraving long-lasting images on metal.
Engraving images into glass creates a smooth, semi-transparent surface that gives the photos an elegant and sophisticated look.
Wood impresses with its natural grain and creates a warm, rustic look in photo engravings. Each of these materials has its own properties and is suitable for different styles and preferences in photo engraving.
Part 2: The 4 most creative ideas for photo laser engraving
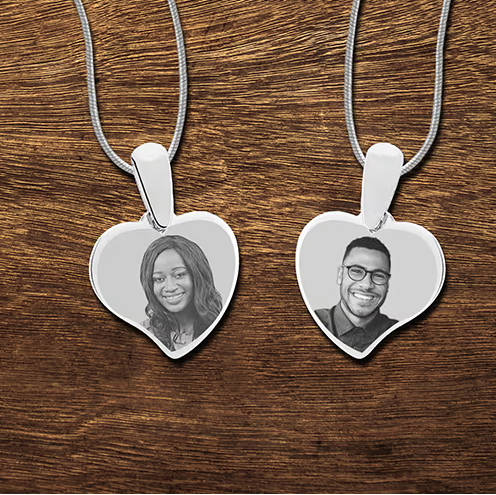
Looking for inspiring ideas for laser engraving photos? Here are four creative suggestions to help you get started. These ideas are designed to spark your imagination and help you launch your next photo engraving project! For example, get inspired by a photo-engraved bracelet, a photo-engraved necklace, or a personalized keychain with your own photo!
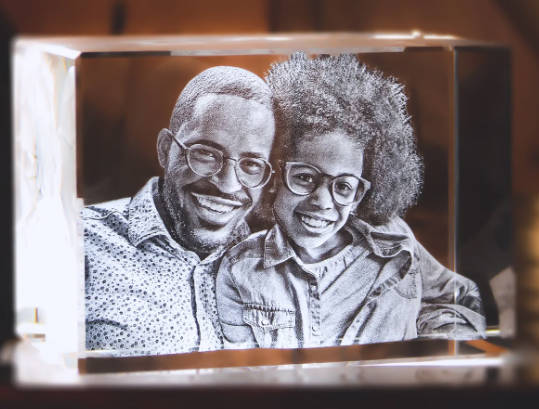
1. Individual photo engraving on crystal
A laser can engrave even the finest details into the surfaces of crystals – often with fascinating, almost three-dimensional effects. The result is elegant, high-quality, and particularly well-suited for gifts or awards.
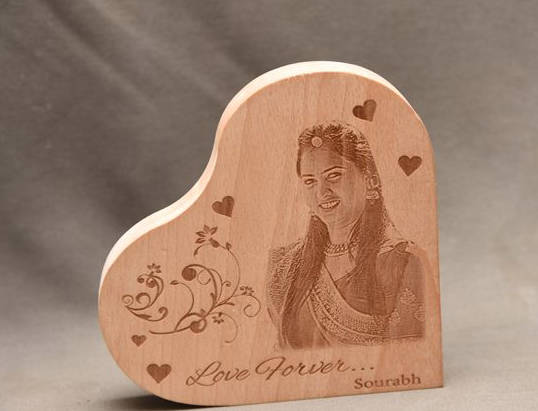
2. Individual photo engraving on wood
The laser makes it possible to transfer memories onto To capture the essence of wood . Imagine a wooden plaque with a landscape scene engraved on it. The natural grain of the wood adds depth and texture to the image, creating a warm, rustic look.
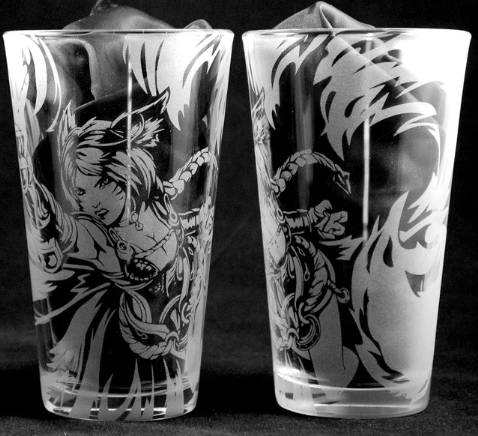
3. Individual photo engraving on glass
The laser can be used to create vibrant designs on Engraving glass brings out bold colors and fine details in a smooth, modern look, making it ideal for personalized gifts or stylish home accessories.
4. Individual photo engraving on metal
With the precision of laser engraving, you can immortalize your memories on metal surfaces.
Case study: Laser engraving a photo onto metal or wood in 5 steps
Preparing for photo engraving on metal or wood:
- Engraving material: Metal / Wooden board
- Engraving machine: Laser engraver
- Engraving design: images, photos, portraits, headshots, etc.
Is it difficult to laser engrave a photo onto metal? Not at all! Whether patterns, quotes, or photos – the process is surprisingly simple. So, How do you prepare a photo for engraving? Don't worry! Simply follow these 5 easy steps to create a personal and detailed design for your laser-engraved photo.
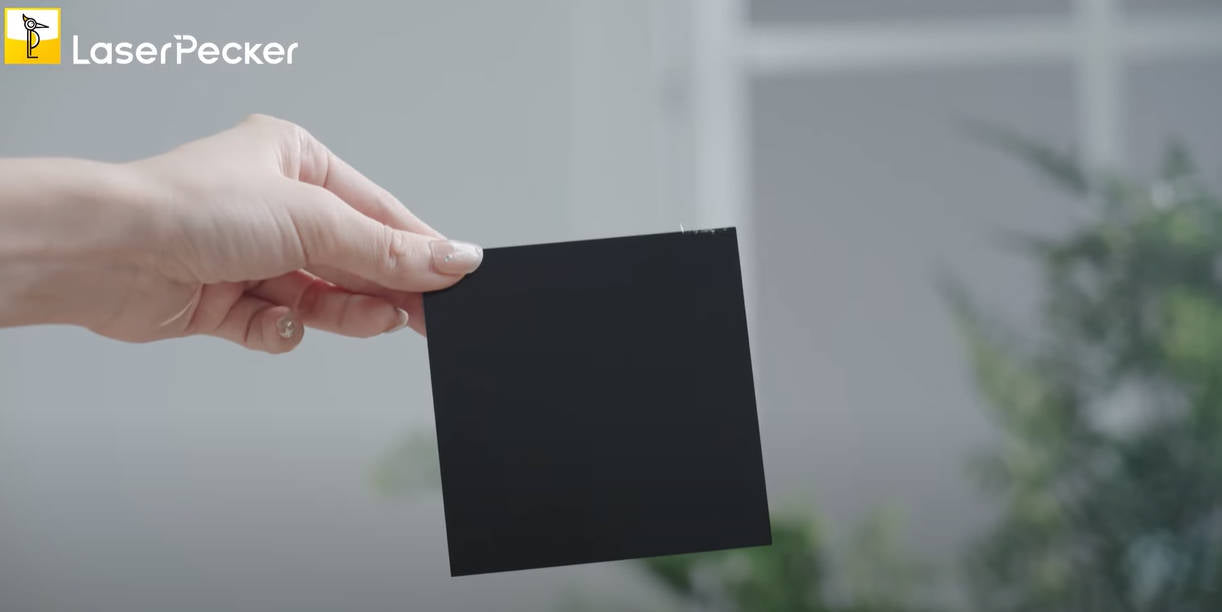
Step 1: Choose the right material – metal plate
Choosing the right metal plate is crucial for achieving optimal engraving results. Metal materials with a smooth and even surface are particularly suitable.
In this guide, we will conduct a case study on photo laser engraving on metal, using a 3 mm thick black metal/wood sheet!
Step 2: Choose the right laser machine for photo engraving
Ensure your laser machine is compatible with the material onto which the photo will be engraved. Analyze different application scenarios and select the machine that best suits your needs.
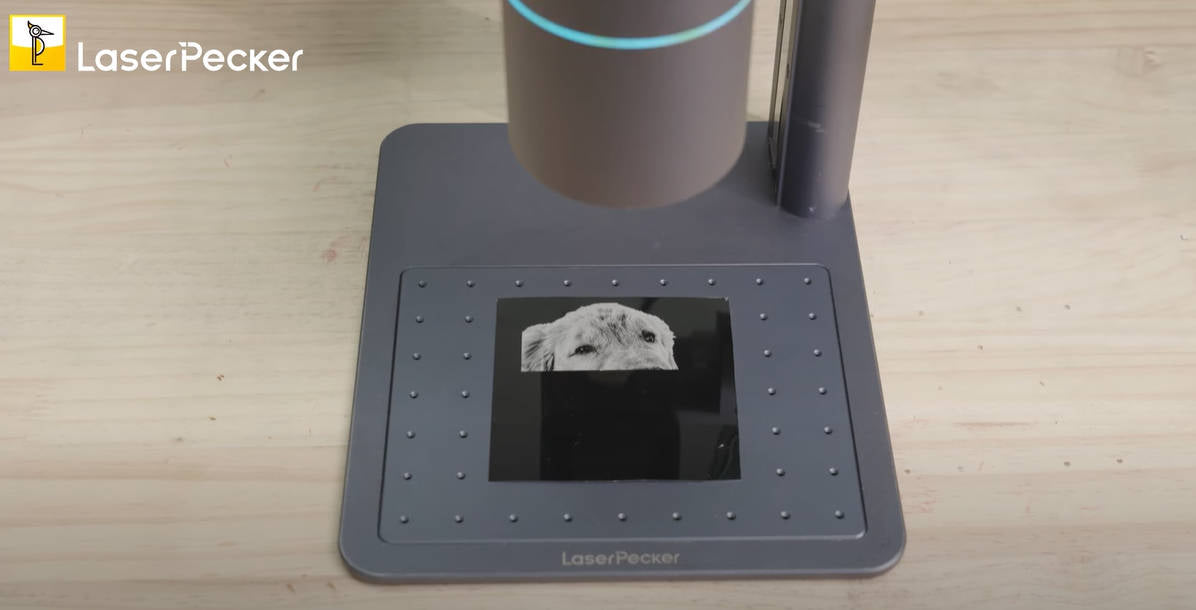
In this example we use the LaserPecker 4 (LP4) , a dual-laser and multifunctional laser engraver that is particularly well suited for photo engraving on a wide variety of materials .
Step 3: Prepare the engraving design
Use a free Graphic design software to create or import the photo or image you wish to engrave onto the metal surface. Pay attention to size, shape, and details such as text or patterns.
To ensure your photo looks its best on metal, glass, wood or other materials, you should follow these steps:
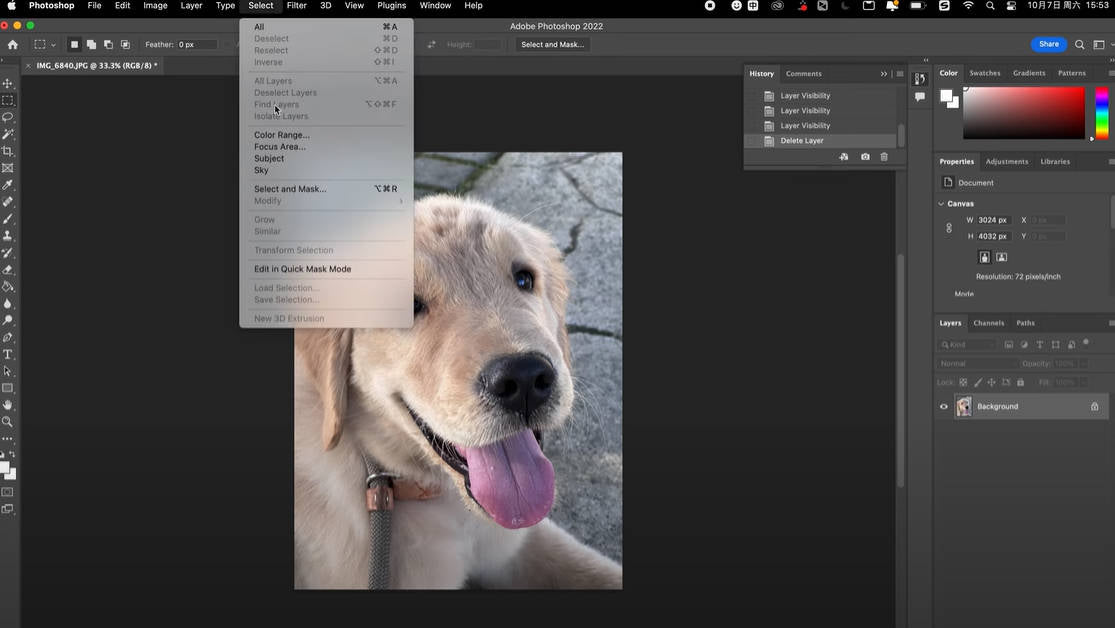
First, remove the background of the image using Photoshop. This ensures that the focus is solely on the subject, without any distractions.
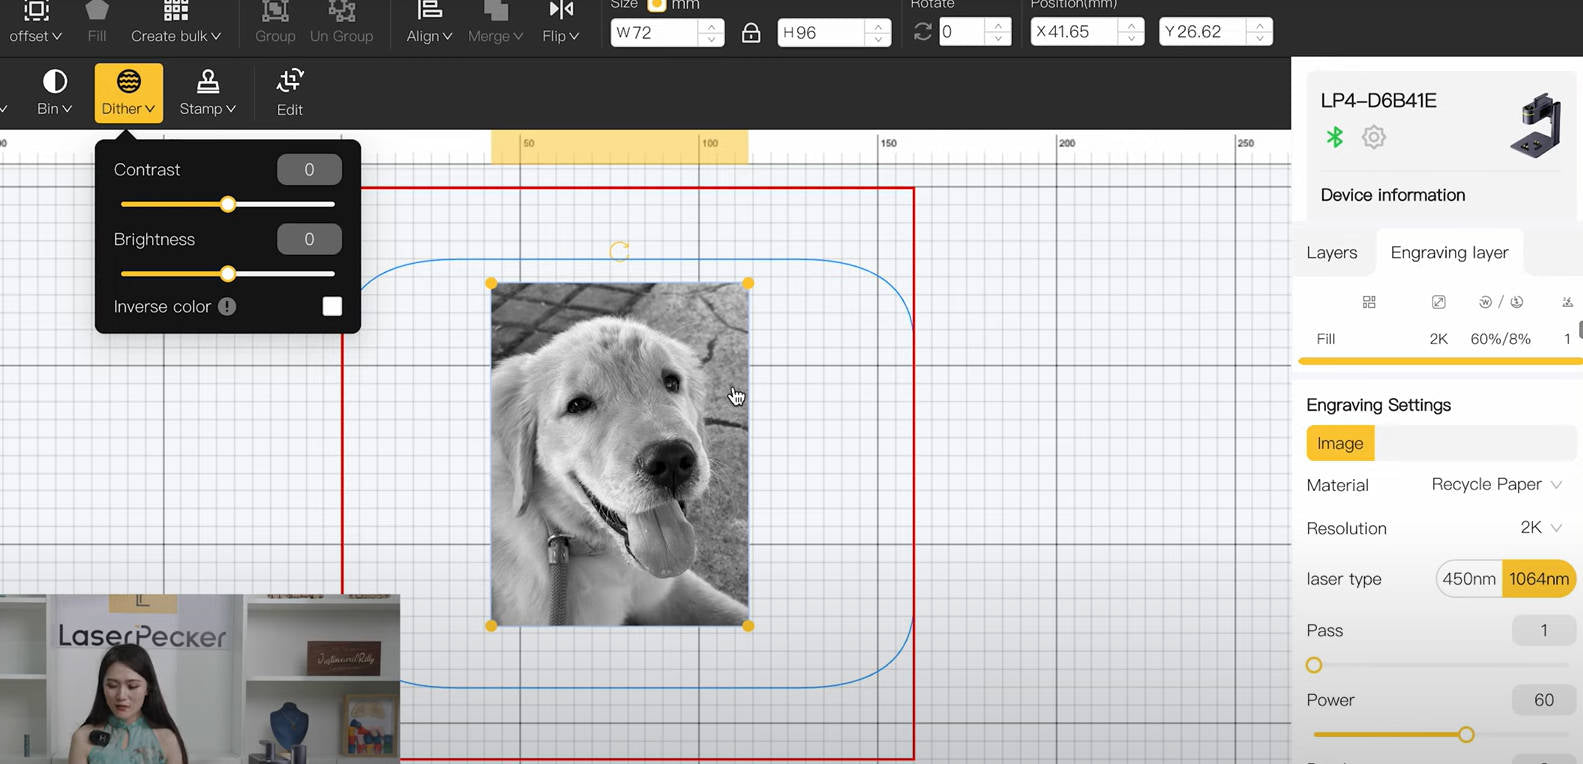
Next, apply the dithering mode to improve the color gradients and smoothness of the engraved photo.
Next, sharpen the photo to optimize fine details and clarity. This will ensure that every element of the image appears sharp and clear.
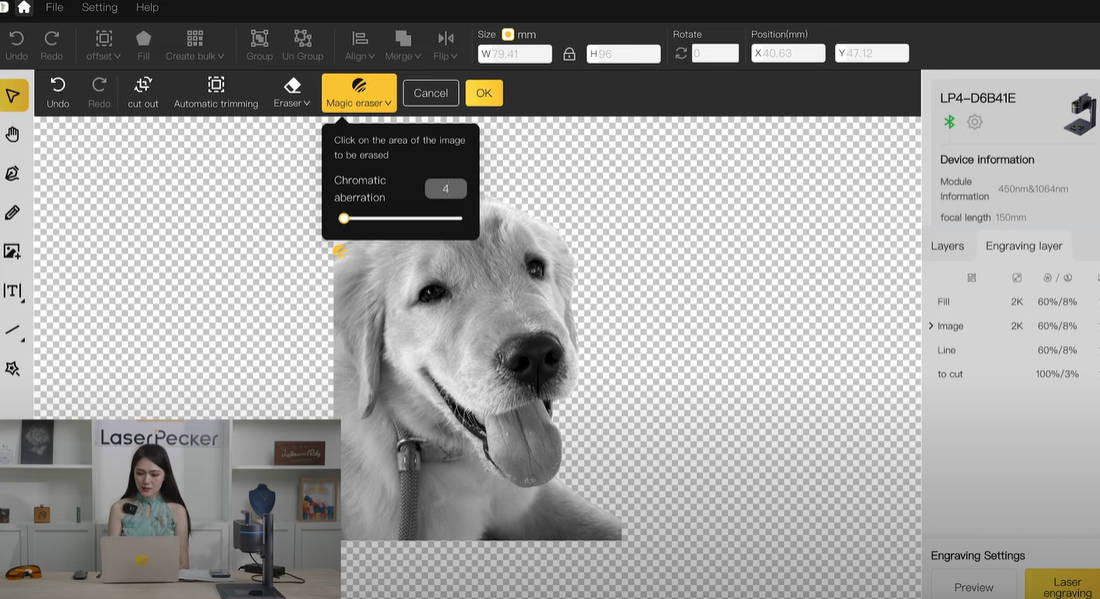
If you are engraving on black metal, invert the colors at the end to ensure accurate representation. Skip this step if you are engraving on other materials or color schemes.

Step 4: Set up the photo laser engraving machine
First, make sure your laser engraver is switched on. Then connect it to your computer or mobile device via the appropriate interface (USB cable, Bluetooth, etc.).
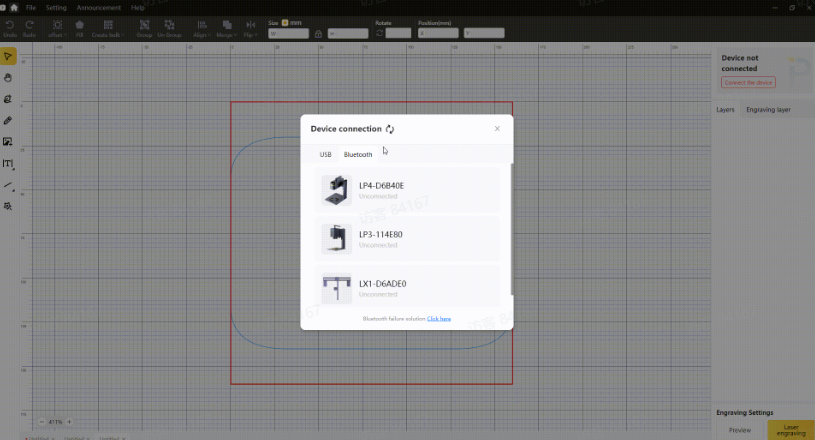
Second: Open your graphics software and load the desired image.
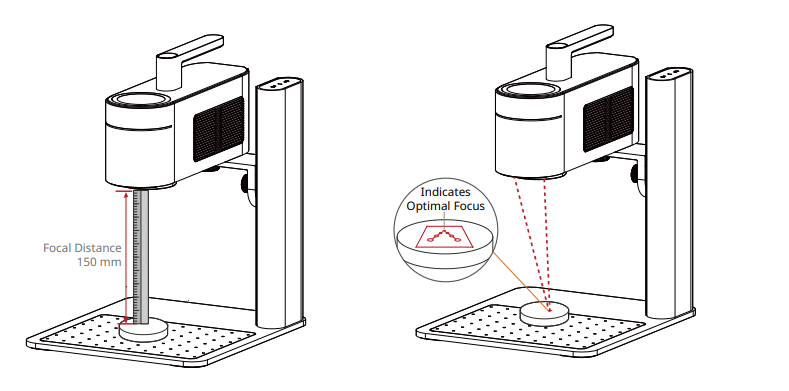
Third: Activate the "preview mode" to check if the laser lens is correctly focused. Two methods are available for this:
When using the LaserPecker 4 (LP4), you can measure the distance between the metal surface and the machine with a ruler. The recommended distance is 15 cm or 150 mm.
Alternatively, you can achieve the correct focal length by checking whether the two red dots emitted by the machine align. This ensures precise focusing for optimal engraving results.
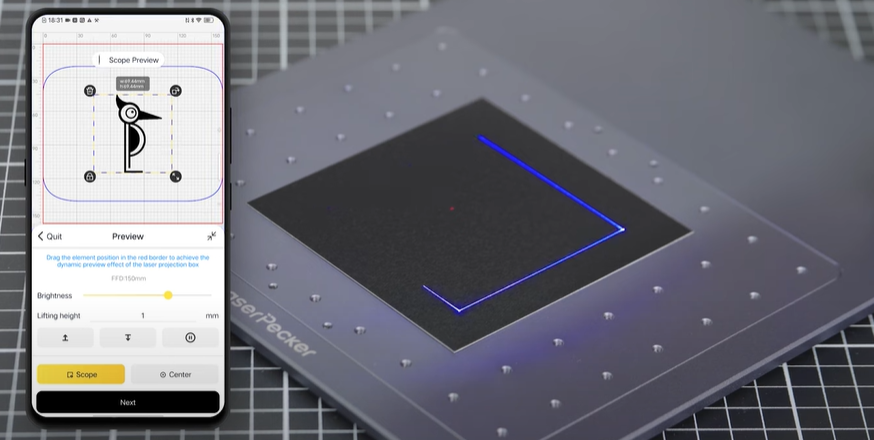
Fourth: You must place the objects within the designated work area and check how the design appears on the metal material. If it doesn't fit correctly, you must adjust its position and size to ensure it matches the dimensions of your project.
Finally, access the software's laser settings to adjust parameters such as power, speed, and resolution according to the metal's properties and the design complexity. You might be wondering, "How much laser power do I need for photo engraving on metal?" or "How deep will a laser engrave a photo in metal?" Don't worry! Here are the recommended settings.
The recommended parameters for laser engraving photos on metal with the LaserPecker 4 are: 2W 1064 nm; Resolution: 2K; Power: 40%; Depth: 10%; Passes: 1.
To further Recommended LaserPecker engraving and cutting parameters To explore, consult the settings overview, which applies to all LaserPecker machines, including LP1, LP2, LP3, LP4 and LP5.

Step 5: Now start engraving your photo onto metal with the laser.
Double-check everything to avoid any mistakes. Then press the start button and watch the magic happen. The laser brings your design to life. Keep an eye on the process, and you're all set!
Please also note that smoke may be produced during laser photo engraving. Wearing a mask or using a [unclear - possibly a safety device] An air purifier is essential for safety.
Conclusion
In summary, this guide showcases image laser engraving as a transformative method for engraving images on various materials. We hope that the creative ideas and detailed case study presented here will inspire you to start your own photo laser engraving projects and discover the joy of engraving.


