Laser engraving stone allows you to create timeless works of art from a material that's readily available. With the right tools, a little skill, and practice, you can create beautiful designs on stones—whether for your home, garden, or as personalized gifts.
In this blog, we'll show you various stone engraving techniques and explain step-by-step how to engrave stones. We'll also introduce you to engraving five different types of stone: slate, granite, marble, sandstone, and limestone.

Contents of this article:
Part 1: Instructions for laser engraving on stone
Laser engraving is a precise method for permanently transferring designs, text, or patterns onto various types of stone. Stone engraving allows for highly detailed engravings that enhance the stone's natural beauty. However, this technique requires specialized equipment and expertise to achieve optimal results.
Tools required for laser engraving on stone
Laser engraving machine for stone: Select a suitable stone engraving machine for the desired stone engraving.
Laser engraving software: Design software compatible with the engraving machine to create or import your own designs.
Stone material: Various stones such as granite, marble, slate or pebbles that are suitable for engraving.
Protective equipment: Safety glasses and gloves to protect yourself from laser beams and dust.
Cleaning materials: Isopropanol, water and a soft cloth to clean the surface.

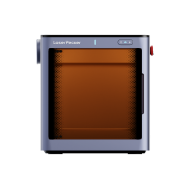
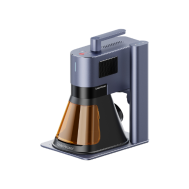
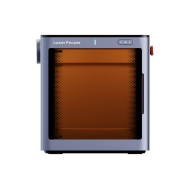
💡 LaserPecker 4 (LP4) - The world's first dual laser engraver for multiple materials
Instructions: Laser engraving a stone
Step 1 – Prepare the design
Import the desired design into the laser engraving software or create one from scratch. Adjust the size, position, and engraving parameters to suit the stone and the desired result.
Step 2 – Prepare the stone
Thoroughly clean the stone surface to remove dust and dirt. Securely position the stone in the work area of the stone engraving machine and adjust the focus.
Step 3 – Set up the laser engraving machine
Configure the appropriate settings for engraving on stone, including laser power, speed, and resolution. These parameters vary depending on the type of stone and the desired engraving depth.
Step 4 – Test engraving and calibration
Perform a test engraving on an inconspicuous area to check the settings. If necessary, make adjustments to optimize quality.

Step 5 – Start the engraving process
Start the engraving process via the software. The laser will follow the created design or text on the stone surface. Monitor the progress during the process to identify errors early and make corrections.
Step 6 – Post-processing the engraving
After completing the stone engraving, carefully remove the stone from the machine. Clean the engraved surface with isopropanol or water and a soft cloth to remove any residue.
Step 7 – Inspection and finishing
Check the engraving for quality and completeness. Optionally, a sealant or polish can be applied to enhance the engraving and increase its durability.
Part 2: Engraving stone with a Dremel
Stone engraving with a Dremel is a versatile and accessible method for carving intricate patterns or designs into various types of stone. This technique offers a creative way to customize and requires only basic tools and a steady hand for precise results.
Tools required for stone engraving with a Dremel
Dremel tool: Choose a model with variable speed and suitable attachments for stone engraving.
Engraving bits: Carbide or diamond-coated cutters in various shapes and sizes for fine details and cuts.
Protective equipment: Safety goggles to protect your eyes from dust and splinters, and a respirator.
Stone material: Granite, marble, quartz or pebbles are suitable for engraving.
Stabilization: Clamps or a solid base to hold the stone in place during engraving.
Cleaning materials: Water, a soft cloth and a brush to clean the surface.

Stone engraving – step-by-step instructions
Step 1 – Prepare the design
Draw the desired pattern or motif onto the stone with a pencil or marker to provide guidance for the engraving.
Step 2 – Choose the right engraving attachment
Depending on the level of detail and design size, select the appropriate engraving attachment that is compatible with the Dremel.
Step 3 – Prepare the stone
Thoroughly clean the stone to remove any dirt and dust. Then securely mount it on a stable surface or secure it with clamps to prevent it from slipping during engraving.
Step 4 – Setting up the Dremel
Insert the selected engraving attachment into the tool and adjust the speed to ensure precise control.
Step 5 – Start engraving
Carefully trace the contours of the design with the Dremel. Maintain a steady hand and apply light pressure. Gradually deepen the engraving, depending on the desired depth and level of detail.
Step 6 – Fine work and details
If necessary, change the engraving attachment to achieve finer lines or shading. Clean the stone regularly during engraving to remove dust and better assess the engraving.
Step 7 – Post-processing
After engraving, clean the surface with a damp cloth to remove any residue. Check the pattern for clarity and depth.
Step 8 – Optional finishing
To make the engraving on stone more durable or to enhance its appearance, a sealant or polish can be applied.
Part 3: Stone engraving by hand (carving technique)
Hand engraving on stone is a traditional yet rewarding technique that allows artisans to create complex designs, patterns, or text on various types of stone using manual tools. This method offers a hands-on approach that allows for a unique level of craftsmanship and precision, requiring skill and patience for optimal results.

Tools required for stone engraving
Stone engraving tools: Various sizes and shapes of chisels with carbide or steel tips for cutting and engraving on stone.
Hammers or chisels: Used to gently strike the chisels to achieve controlled and precise engraving.
Protective clothing: Safety goggles, gloves, and a dust mask to protect against debris and ensure personal safety.
Stone material: Choose stones such as granite, marble, slate or limestone that are well suited for stone engraving.
Cleaning materials: Water, a soft cloth and a brush to clean the stone surface during and after engraving.
Instructions for engraving the stone
Step 1 - Design preparation
Sketch or trace the desired design onto the stone surface with a pencil or marker as a guide for engraving.
Step 2 - Selecting the chisel
Choose appropriate chisels based on the complexity of the design. Larger chisels for broader strokes and smaller ones for fine details.
Step 3 - Stone preparation
Ensure the stone surface is clean and free of debris. Position the stone securely on a stable surface or workbench.
Step 4 - Start the engraving process
Begin engraving by holding the chisel at a slight angle to the stone surface. Use controlled blows with the hammer or mallet to create indentations along the design contours. Gradually deepen the engraved lines by repeating the process, adjusting pressure and angle for depth and detail.
Step 5 - Detailing and Refinement
Work on intricate details with smaller chisels or adjust the angle and force of your blows. Take regular breaks to assess your progress and ensure the design is developing as desired.
Step 6 - Cleaning and inspection
Regularly clean the stone surface with water and a soft cloth to remove deposits and make the engraved design more visible. Check the engraved lines for consistency and clarity and make adjustments as needed.
Step 7 - After engraving
After the engraving is complete, thoroughly clean the stone surface to remove any remaining dust or dirt. Optionally, you can use a special sealant or polish for stones to enhance the appearance and protect the engraved surface.
Part 4: Engraving different types of stones
1. How to engrave slate
- Tool selection: Use fine engraving tips or diamond tools suitable for engraving stone on slate. Diamond cutters are particularly suitable for detailed designs.
- Technique: Make sure you have a steady hand and apply even pressure when engraving on slate. Choose shallow, delicate cuts, as slate is prone to splintering.
- Test engraving: Practice on a small piece of slate before starting your main design to get a feel for the depth and texture control needed.
2. How to engrave granite
- Durable engraving tips: Use harder materials such as tungsten carbide or diamond tips, as granite is a very hard stone.
- Speed and pressure: Set the engraving machine to a medium speed and apply firm, but not excessive, pressure to achieve clean, precise lines.
- Cooling breaks: Take regular breaks to avoid overheating of the tool and stone and to achieve better results.
3. How to engrave marble
- Gentle pressure: Marble is softer than granite, so light pressure should be applied when engraving stone to avoid deep or unintentional marks.
- Fine details: Use smaller engraving tips for intricate details on marble. Test the depth and pressure beforehand to achieve the desired result.
- Surface preparation: Ensure the marble surface is clean and free of debris to avoid scratches or irregularities during engraving.
4. How to engrave sandstone
- Low speed engraving: Sandstone is delicate and requires slower speed settings on the stone engraving machine to avoid damaging the surface.
- Be patient with the pressure: Apply gentle and even pressure when engraving sandstone. Avoid excessive force to prevent chipping or cracking.
- Caution with deep etching: Be careful with deep engravings on sandstone, as this can weaken the stone's structure. Choose shallow engravings for better results.
5. How to engrave limestone
- Careful tool selection: Choose engraving bits suitable for softer stones to avoid damage. Diamond bits or carbide chisels with smaller tips are well suited for limestone.
- Surface test: Test a small piece of the limestone surface to understand how the stone responds to the engraving depth and pressure.
- Light pressure: Apply light and even pressure to prevent the limestone from flaking or chipping during engraving.
FAQs about stone engraving
1. Can any stone be engraved?
Many stones can be engraved, but some are easier to work with than others. Granite, marble, slate, sandstone, and limestone are commonly used for stone engraving due to their varying hardness and texture.
2. How to engrave stone at home?
You can create designs on stones using tools such as chisels, Dremel tools, or a laser engraving machine. Be sure to wear safety equipment and practice on small stones first. It's important to work in a well-ventilated area, as dust is generated.
3. Where can I find resources or tutorials to learn stone engraving?
Online tutorials, how-to videos, and community forums dedicated to stone engraving are easy to find. Additionally, local craft stores or workshops may offer classes or guidance to get started with DIY stone engraving.
Conclusion
In summary, stone engraving opens the door to endless creative possibilities. Whether using a stone engraving machine, a Dremel tool, or other methods, mastering this art requires patience, practice, and attention to detail.
Each stone type—from slate to granite, marble, sandstone, and limestone—requires specific techniques to achieve the best results. By following tailored tips and guidelines, enthusiasts can create stunning designs that highlight the stone's natural beauty.
Discover the artistry, experiment with different stones, and unleash your creativity. With the right knowledge and the right stone engraving tools, DIY stone engraving becomes a creative process that transforms ordinary stones into timeless works of art that will last for generations.


