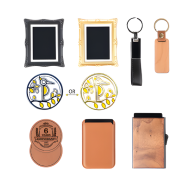
Resin is a versatile material that allows for impressive, creative engravings. Whether you're a beginner or an experienced craftsperson, this blog will give you essential tips and techniques to take your resin engraving to the next level.

In this article:
Part 1: Important tips for resin engraving
Resin engraving requires a steady hand and precise techniques to achieve perfect results. Here are some basic tips to help you achieve the best results:
- Choose the right tools: Use tools specifically designed for resin engraving. Diamond-coated cutters, engraving pens, or rotary tools are particularly popular because they work precisely and are ideal for resin engraving.
- Take safety precautions: Protect yourself by wearing safety goggles, gloves, and a mask to protect yourself from fine resin etching dust. Also, work in a well-ventilated area to avoid fumes.
- Prepare the surface: Ensure that the resin processing takes place on a clean and dust-free surface. Sanding or polishing can significantly improve the quality of the epoxy resin engraving.
- Plan the design: Think about your motif in advance. A template or markings on the surface can help you work precisely, especially with detailed or intricate patterns.
- Adjusting technique and pressure: Practice resin engraving on a sample piece first. A steady hand and the right pressure variation are crucial for the depth and style of the engraving.
- Patience and a willingness to experiment: Laser resin engraving requires patience and creative experimentation. Take the time to test and perfect your technique.
- Don't forget the finishing touches: After engraving, the surface should be cleaned. A final sealant or polish can improve the clarity and longevity of the resin laser engraving.
Part 2: How to engrave a name on resin?
Resin engraving adds a personal touch to jewelry, decorative items, and gifts. Follow these steps to precisely apply names to a resin engraving surface:
Step 1 – Prepare the resin surface:
Make sure the surface is clean and smooth. Sand or polish the area where the name will be engraved to create a smooth surface for the epoxy resin engraving.
Step 2 – Design and Marking:
Choose the font, size, and placement of the name. Lightly trace the name onto the resin engraving surface with a fine marker or pencil to provide a guide for the engraving.
Step 3 – Choose the right tool:
Use a suitable tool, such as a rotary tool with a fine diamond tip. Make sure it's suitable for intricate details, especially if you're using resin laser engraving or manual engraving.
Step 4 – Practice and refine your technique:
Test resin engraving on a sample piece first to familiarize yourself with the tool. Hold the engraving tool steady and apply consistent pressure to achieve a clean result.
Step 5 – Engrave names:
Carefully begin engraving the name along the marked lines. Work slowly and precisely to achieve the desired depth and clarity. If using a laser resin engraving technique, adjust the settings accordingly.
Step 6 – Clean and refine:
After engraving, remove any dust and residue. Use fine sandpaper or polishing compound to smooth the engraved surface and enhance the name.
Step 7 – Sealing or finishing (optional):
A final seal with a layer of resin or clear varnish can protect the engraving and provide a glossy finish. This is especially recommended for epoxy resin laser engraving.
Step 8 – Review and finalize:
Examine the engraving and make any final adjustments. Once the result meets your expectations, the project is complete.
Part 3: How does resin laser engraving work?
Resin laser engraving enables precise, detailed designs and customization on synthetic resin and epoxy surfaces. Follow these steps for perfect results:
Step 1 – Prepare resin
Ensure the surface is clean, smooth, and free of dust or dirt. Securely place the resin within the work area of the laser resin engraving machine to prevent movement during engraving.
Step 2 – Choose the right settings
Adjust the settings of your laser engraving machine to the resin material and thickness. Select the optimal speed, power, and resolution to achieve the desired engraving depth and precision.
Step 3 – Prepare the design:
Create or upload the desired design or text into compatible software. Adjust the size, position, and orientation of the resin engraving to ensure precise placement.
Step 4 – Test run and calibration
Perform a test run on a similar material or an inconspicuous area of the resin to ensure that the settings and design are optimal.
Step 5 – Start engraving:
Begin the epoxy resin laser engraving on the resin surface. Monitor the process closely to ensure the design is executed correctly. Adjust the settings during the process if necessary.
Step 6 – Cooling and cleaning:
After engraving, let the resin cool down if the laser generates heat. Carefully remove any residue or dust with a soft brush or air blower to optimize the engraving result.
Step 7 – Post-processing (optional):
For additional durability and better visibility of the engraving, you can apply a protective coating or a new layer of resin. This can be particularly beneficial for resin laser engraving.
Step 8 – Quality control:
Review the engraving results and ensure all details are clear and precise. Make any final adjustments if necessary.
Step 9 – Observe safety measures:
When working with a resin laser engraving machine, protective measures are essential. Wear appropriate eye protection and ensure adequate ventilation in the work area.
Part 4: The 10 most frequently asked questions about resin processing
Q1: Can any type of resin be engraved?
In principle, most resin types can be engraved, including epoxy, polyester, and polyurethane resins. However, it is recommended to test the resin engraving on an inconspicuous area first to ensure the material is suitable.
Q2: Which tools are best for resin engraving?
For precise engraving, diamond-tipped cutters, engraving pens, rotary tools, or laser resin engraving machines are often used. The choice of tool depends on the desired level of detail and engraving depth.
Q3: How deep can you engrave resin?
The engraving depth depends on the hardness of the resin and the tool used. With resin laser engraving, engraving depths of a few to several millimeters are possible, depending on the project requirements.
Q4: Can fine details be engraved in resin?
Yes, resin is well-suited for detailed engraving. Epoxy resin laser engraving, in particular, allows for precise and intricate designs with high accuracy.
Q5: Does the engraved surface need to be sealed?
Sealing isn't absolutely necessary, but it can protect the engraving and enhance its appearance. A thin protective layer of resin or a clear varnish can help preserve the resin engraving.
Q6: Can resin be engraved without special equipment?
Simple engravings can be performed using hand tools such as rotary tools or needle mills. However, for more precise and complex designs, resin laser engraving or a dedicated engraving tool is recommended.
Q7: How do I avoid cracks or chips during engraving?
Consistent pressure and an adjusted engraving speed help prevent cracks or splintering. Furthermore, the resin should be fully cured before starting resin processing.
Q8: Is resin engraving suitable for beginners?
Yes, beginners can start with simple designs and gradually work their way up to more complex patterns. It's recommended to practice on scrap pieces before tackling larger projects.
Q9: Can engraved resin surfaces be subsequently colored?
Yes, there are various ways to emphasize the engraving, such as painting, pigments, or filling the engraving lines with colored resin to increase the contrast.
Q10: Does resin engraving produce harmful fumes?
Engraving resin can generate fumes or dust particles. Therefore, always work in a well-ventilated area and wear appropriate protective equipment. Adequate protection is especially important when engraving with epoxy resin.
Conclusion
Resin engraving requires skill, technique, and creativity. From choosing the right tools to adapting the engraving method—whether by hand or with laser resin engraving—there are numerous possibilities for customization.
Whether delicate patterns, lettering, or complex designs: with patience and practice, impressive results can be achieved. Those willing to explore and refine different techniques will make rapid progress.
Safety and careful surface preparation are crucial for optimal results. With the right approach, you can create unique, personalized resin works of art that combine craftsmanship with individual style. Have fun experimenting!


