


"Has anyone ever laser engraved a golf ball?"
Golf balls are an indispensable piece of equipment in golf, designed for optimal flight and best possible performance. Each personalized golf ball consists of a core, a cover, and a dimple pattern that influences its speed and trajectory.
When it comes to laser engraving golf balls, it often refers to engraving your name, individual designs, logos, or other text onto the surface of the golf ball.
In this guide, we take a closer look at laser engraving golf balls – learn how it works, what benefits it offers, and how to create personalized, engraved golf balls step by step. Let's dive into this exciting topic together!

In this article:
Part 1: What is laser engraving golf balls and what machine is used for it?
1.1 How does laser engraving work on a golf ball?
As mentioned earlier, laser engraving golf balls refers to the process of engraving designs, logos, or text onto the surface of the ball. Golf balls typically consist of urethane, ionomer, or Surlyn covers – materials valued for their durability, spin control, and performance.
Engraving is done with a high-precision laser beam that transfers controlled heat to the surface without affecting the ball's structure. This creates permanent and detailed markings without any ink or adhesives. This method is therefore ideal for personalizing golf balls with logos, names, or individual patterns.

1.2 Laser Engraving Machine/Tool for Golf Balls
To engrave golf balls, a laser engraver is needed. This tool is crucial for achieving precise and durable engravings on the surface of the ball. It ensures accuracy and efficiency, making the personalization process particularly smooth.
Since there are various laser engraving machines, the question arises: Which laser is best suited for engraving golf balls? or Which machine do I need to engrave golf balls?
For home use or smaller engraving projects, diode laser engravers are an excellent choice. They offer mobility, user-friendliness, and cost-effectiveness – ideal for personalizing golf balls with names, logos, or individual designs.

1.3 Why are lasers ideal for engraving golf balls?
Compared to traditional marking methods, lasers offer significant advantages for engraving golf balls. From highest precision to consistent quality – here are the main reasons why laser technology stands out:
Non-contact Precision
Unlike mechanical engraving, the laser does not touch the ball directly. This avoids deformation or surface damage – crucial for maintaining the balance and playing characteristics of the ball. With accessories like the accessories like the Rotary Extension, golf balls can also be engraved from any angle with excellent results.
Fast Personalization
Traditional engraving or pad printing are slower and often require manual setup for each new design. Lasers, on the other hand, can change designs instantly, allowing for faster production and flexible on-demand customization.
Consistent Quality in Series
Ideal for mass production – every engraving is identical, ensuring professional, uniform branding or personalized design.
No Consumables or High Maintenance
Conventional methods require inks, stencils, or cutting tools that need regular replacement and are often messy. Laser engraving is cleaner, low-maintenance, and cost-effective in the long run.
💡 Case Study: Laser Engraving a Personalized Plastic Golf Ball in 5 Steps
Preparation Checklist for Laser Engraving Golf Balls:
- Engraving Material: Golf ball
- Engraving Machine: Laser engraver
- Engraving Design: Name, logo, images, patterns, etc.
Is laser engraving golf balls difficult? No! The process is straightforward. So, how do you engrave golf balls? Don't worry – just follow these 5 simple steps to create personal and detailed designs on your custom engraved golf balls.
Step 1: Select Material – Plastic Golf Ball
Choosing the right material is crucial for achieving an optimal engraving result. Different materials require specific laser settings to ensure precise engraving. It's also important to ensure that the golf ball material is suitable for laser engraving to avoid potential safety risks.
In this guide, we will conduct a case study: engraving a name on a plastic golf ball.

Step 2: Choose the right laser engraving machine for engraving golf balls
Here we choose the LaserPecker 4 (LP4), – a dual-laser and multifunctional laser engraver, which is particularly suitable for engraving plastic golf balls.
* Alternative
If you want to achieve higher engraving speed and even better results on plastic surfaces, you can also opt for a more powerful laser engraver like the LP5.

Step 3: Prepare your engraving design
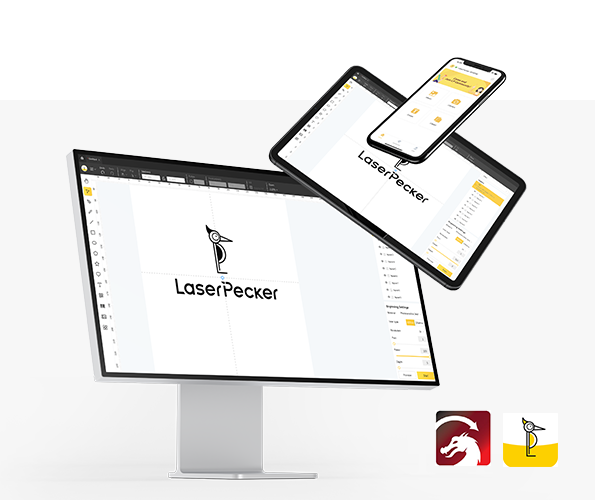
Use a LaserPecker graphic design app or software to create or import the desired image, or enter the text you want to engrave on the surface of the golf ball. Pay attention to size, shape, and details such as font or pattern.
Step 4: Set up the golf ball laser engraving machine
① First, make sure your engraver is turned on, then connect your laser engraver to your computer or mobile device via the appropriate interface (USB cable, Bluetooth, etc.).
② Then open the graphic design app or software and load your design.
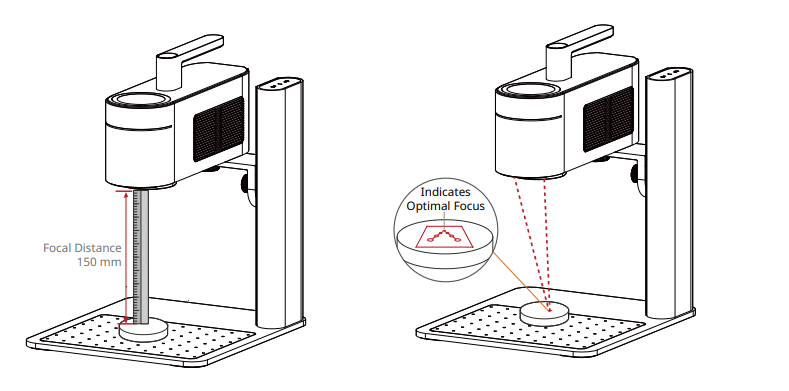
③ Switch on the "Preview Mode" to check if the laser lens is correctly focused. Correct focusing of the laser engraving machine is crucial to achieve a high-quality engraving!
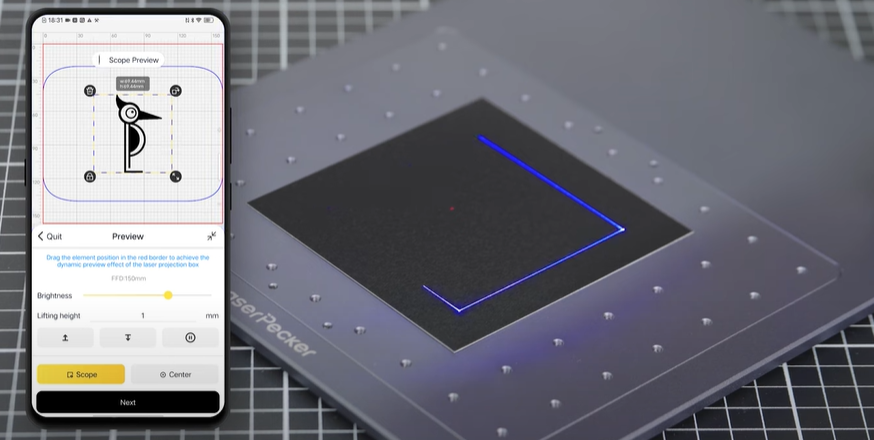
④ Fourth, you need to place the items within the designated work area and check the appearance of the design on the golf ball. If it doesn't fit correctly, you need to adjust the position and size to ensure it matches the dimensions of your project.
⑤ Finally, access the software's laser settings to adjust parameters such as power, speed, and resolution according to the golf ball's properties and the design's complexity. You might be wondering: "How much laser power is needed to engrave a golf ball?" Don't worry, I've got you covered!
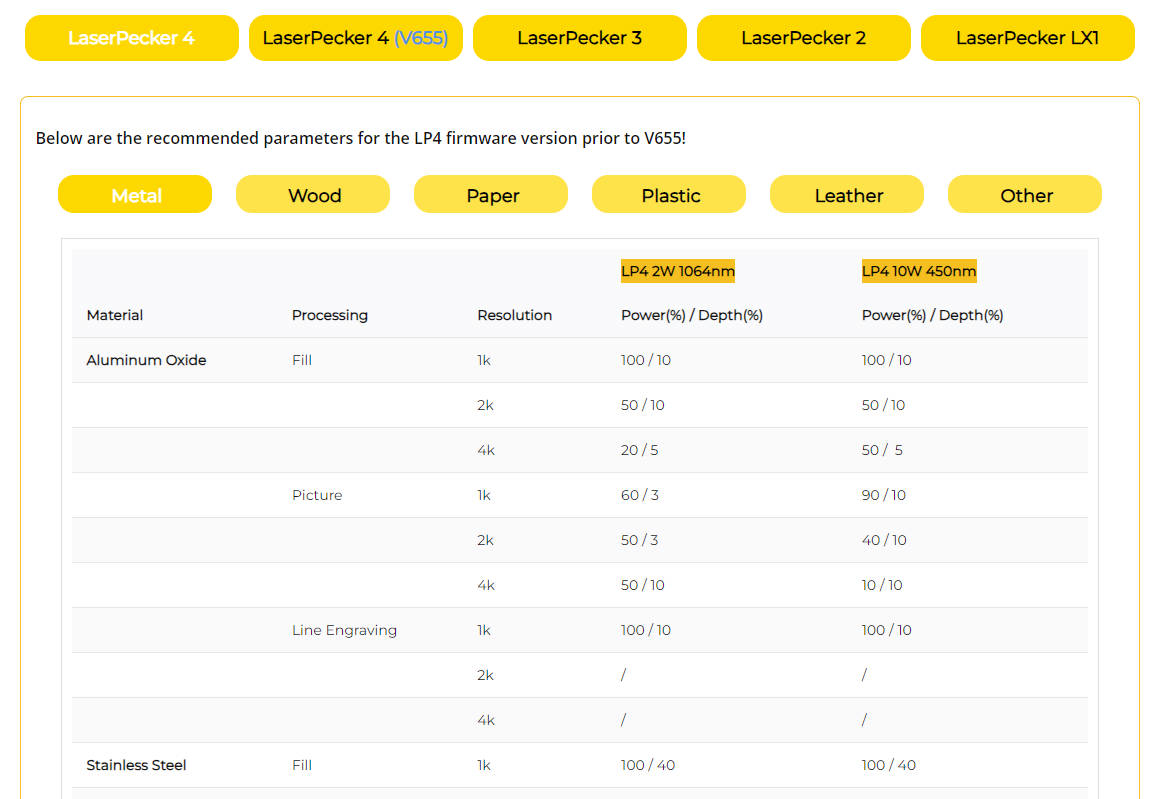
To achieve the best results, the recommended material settings for the LaserPecker 4 when engraving a golf ball are: 2 W, 1064 nm; Resolution: 2K; Power: 100%; Depth: 60%; Pass: 1.
To explore more recommended engraving and cutting parameters from LaserPecker, refer to the settings table, which applies to all LaserPecker machines, including LP1, LP2, LP3, LP4, and LP5.
Step 5: Start Laser Engraving Your Golf Ball Now
Double-check everything to avoid errors. Then press the start button and watch the magic happen. The laser brings your design to life. Keep an eye on the process, and you're done!
Please also note that smoke or toxic gases may be produced during the laser engraving process. Wearing a mask or using an air purifier is essential for safety.
Conclusion
In summary, laser engraving offers unparalleled precision and quality when it comes to personalizing golf balls. Whether you engrave golf balls with names or apply logos and designs to the surface of the golf ball, the process ensures durability and clarity without affecting the ball's performance.
Furthermore, laser engraving with advanced features such as adjustable focus and specialized accessories provides the perfect solution for creating unique, high-quality engraved golf balls.
Ready to create a personalized golf ball with a name? Try the LaserPecker 4 today and take your engraving game to a new level!


