An engraved fountain pen is far more than just a writing instrument—it's a personal statement, a thoughtful gift, or a high-quality promotional item. Whether you want to add initials to a metal fountain pen, engrave a logo on a wooden barrel, or create a unique design—choosing the right engraving method is crucial for a perfect result.
In this guide, we'll show you four effective ways to engrave fountain pens—from modern high-tech methods like lasers and CNC to more traditional approaches using engraving pens or rotary tools. This way, you can find the method that suits your material, style, and experience level.

In this article:
- Method 1: Engraving fountain pens with a laser engraving machine
- Method 2: Engraving fountain pens with a rotating tool
- Method 3: Engrave fountain pens manually by hand engraving
- Method 4: Engraving fountain pens with a small CNC machine
- FAQs: The most important questions about fountain pen engraving
Method 1: Engraving fountain pens with a laser engraving machine
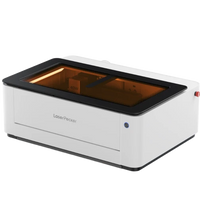
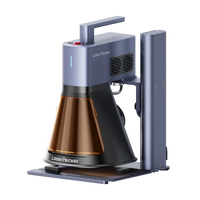
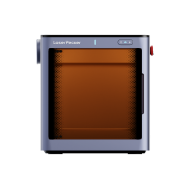
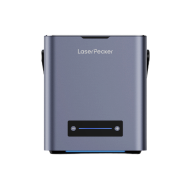
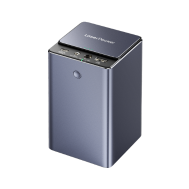
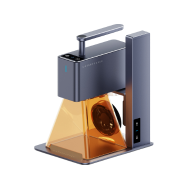
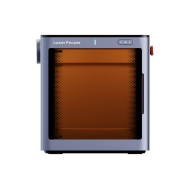
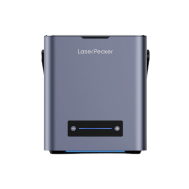
Laser engraving is one of the most precise and popular methods for customizing a fountain pen. It uses focused laser energy to mark or burn the surface—ideal for names, logos, or fine patterns on metal, wood, acrylic, or coated fountain pens.
What you need:
- A laser engraving machine
- Filler with suitable surface (e.g. metal, wood, acrylic, coated plastic)
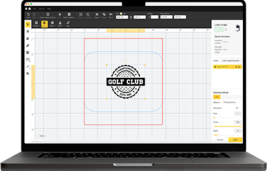
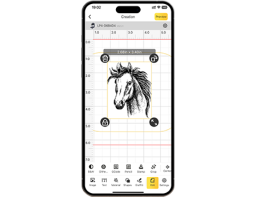
- Design software (e.g. LightBurn or LaserPecker Software & App )
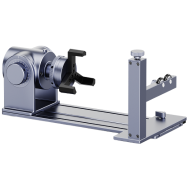
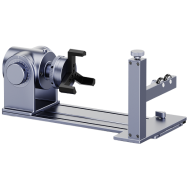
- Rotary attachment (recommended for cylindrical fillers)
Steps to laser engrave a fountain pen:
Step 1: Create or import a design
Prepare your text, logo, or pattern in the software. Adjust the size precisely to fit the writable area of the pen body.
Step 2: Fix the filler
Place the pen in a rotary mount to ensure even engraving all around. For flat pens, simply attaching it directly to the laser table is sufficient.
Step 3: Set parameters
Adjust laser power, speed, frequency, and focus according to the material. Test runs help with fine-tuning.
Step 4: Check the preview
Use the software's frame or preview function to ensure your subject is positioned and scaled correctly.
Step 5: Start engraving
Start the engraving and monitor the process. Activate ventilation or air support if necessary.
Step 6: Clean and check
After engraving: Remove any residue with a soft cloth. Check the result for clarity and uniformity.
Advantages & disadvantages of laser engraving:
👍Advantages:
Highest precision and professional results
Ideal for fine logos, lettering and small details
Works on many materials
👎Disadvantages:
Requires a powerful machine with sufficient work space
Method 2: Engraving fountain pens with a rotating tool
A simple and practical method for anyone who enjoys DIY: Using an engraving pen or Dremel, you can customize a fountain pen with engraving—be it with a name, initials, or small motifs. This DIY method is perfect for unique pieces or creative gift ideas.
What you need:
- Rotary tool or electric engraving pen
- Screw clamp, rubber pad or non-slip mat
Steps for engraving with a rotary tool:
Step 1: Mark the motif
Sketch your design or initials directly onto the pen with a fine marker. Alternatively, you can use a stencil.
Step 2: Fix the filler
Clamp the pen in a soft holder or place it on a non-slip surface to prevent it from moving while engraving.
Step 3: Select the appropriate cutter
Depending on the material, use a diamond or carbide cutter.
Step 4: Start engraving
Guide the tool over your design with light pressure. Let the cutter do the work—too much pressure can damage the surface.
Step 5: Touch up and clean
If necessary, trace or deepen lines. Then, wipe the engraving pen clean of dust with a cloth.
Advantages & disadvantages of engraving by hand:
👍Advantages:
Affordable entry-level, ideal for hobby projects
Perfect for individual pieces and creative ideas
👎Disadvantages:
Less precise than laser or CNC
Requires a steady hand and some practice
Method 3: Engrave fountain pens manually by hand engraving
Hand engraving is a traditional and artistic technique in which the design is manually carved into the surface using fine tools. This method is particularly suitable for high-quality writing instruments that require an elegant, personal touch—ideal for collectibles or gifts of lasting value.
Tools required:
- Hand engraving stylus
- Engraving vice or padded holder
- Magnifying glass or jeweler's loupe for delicate work
Steps to hand engrave a fountain pen:
Step 1: Plan your motif
Sketch the desired motif or initials directly onto the fountain pen with a fine pen.
Step 2: Fix the filler
Clamp the pen securely in a jewelry holder or padded clamp to prevent slipping while engraving
Step 3: Prepare the tools
Choose the right engraving shape for your design—e.g., round or flat—and make sure the burin is well sharpened.
Step 4: Engraving
Guide the tool along your sketch in smooth movements. Work slowly, precisely, and in small sections.
Step 5: Clean
Remove any metal shavings with a brush or cloth. Optionally, polish the engraved surface for a smooth finish.
Advantages & disadvantages of hand engraving:
👍Advantages::
Noble, handcrafted look
Perfect for luxury fountain pens or personalized gifts
👎Disadvantages:
Requires experience and practice
Very time-consuming
Mistakes are difficult to correct
Method 4: Engraving fountain pens with a small CNC machine
A small CNC machine enables highly precise and repeatable fountain pen engraving—particularly suitable for small batches or logos with consistent quality. This computer-controlled technology allows even complex patterns to be permanently and deeply engraved into metal, wood, or acrylic fountain pens.
Tools required:
- CNC milling machine
- Clamping device or holder for filler
- Design and CAM software
- Fine milling cutters or engraving cutters
Steps to engrave a fountain pen with CNC:
Step 1: Prepare the design
Create or import your logo, lettering, or pattern into the software. Generate the milling paths using CAM software.
Step 2: Fix the filler
Secure the pen precisely to the work surface using a special holder, a rotating attachment, or soft clamping jaws.
Step 3: Select cutter and settings
Select the appropriate cutter (e.g. V-bit) and adjust the speed, feed rate and cutting depth to suit the material
Step 4: Perform a test run
Engrave a test piece beforehand to check the fit and quality.
Step 5: Start engraving
Start the milling process and monitor the progress—pay attention to vibrations or tool wear. Use dust extraction if necessary.
Step 6: Clean and check
Remove the engraving pen from the holder, remove any chips, and check the engraving. Optionally, you can polish or seal the engraved surface.
Advantages & disadvantages of CNC engraving:
👍Advantages:
Highest precision and repeatability
Ideal for logos, serial engravings or promotional items
👎Disadvantages:
Training in CNC software required
Loud and dusty
FAQs: Frequently asked questions about fountain pen engraving
1. Can any fountain pen be engraved?
Not every pen is suitable for engraving. Fountain pens with smooth, flat surfaces are ideal – for example, those made of metal, wood, high-quality plastic, or leather. Depending on the material, the engraving depth and level of detail can vary, so the fountain pen engraving should be adapted to the specific material.
2. What messages can be engraved on a fountain pen?
Whether names, dates, short quotes, or even company logos – the possibilities for engraving fountain pens are endless. You can customize your fountain pen to suit the occasion.
3. How deep is the engraving on a fountain pen?
The engraving depth depends heavily on the chosen technique. With laser engraving, for example, the depth can vary depending on settings such as power and speed. It's important to consider the material and intended use.
4. Can delicate designs also be engraved?
Yes, modern laser engraving technology allows for even highly detailed patterns on fountain pens. The more complex the design, the longer the engraving takes—and the more important it is to precisely coordinate the laser settings.
5. Are there any size restrictions for engraving fountain pens?
Many laser engraving machines have adjustable mounts to accommodate different pen sizes. Cylindrical shapes are particularly well-suited for engraving with a rotary attachment.
6. How do you clean and care for an engraved fountain pen?
Simply wipe with a soft, slightly damp cloth – avoid harsh cleaning agents. To avoid scratches, store engraved pens in a case or pouch.
7. Can fountain pens also be engraved?
Yes, fountain pens can also be engraved. Due to the delicate craftsmanship (e.g., the nib), a precise method such as laser engraving, which only processes the barrel area, is recommended.
8. Can I engrave multiple pens at the same time?
Yes – with suitable machines and holders, multiple pens can be engraved simultaneously. Precise positioning is crucial for a consistent result.
9. Is it possible to engrave fountain pens at home?
With a compact laser device or engraving pen, you can create personalized engraved fountain pens at home. However, for larger quantities or very fine details, a professional engraving service is recommended.
10. Is it permissible to engrave copyrighted designs?
You shouldn't use protected logos or designs without permission. Make sure you only use royalty-free or self-created designs to avoid copyright infringement.
Conclusion
A fountain pen engraving can be simple or sophisticated – depending on the method you choose.
Laser engraving offers speed and precision, ideal for logos and larger quantities.
Rotary tools are perfect for DIY projects and personalized pieces. Hand engraving adds a particularly artistic touch to the pen.
CNC machines ensure consistent results with deeper engraving – ideal for professional applications.
No matter your preferred method, engraving transforms an ordinary fountain pen into a truly personalized writing instrument. Choose your tool, plan your design—and bring your creativity to paper.


