


Engraved glass is perfect for personalized gifts. Whether it's a custom wine glass set, a beer stein with the recipient's name and a meaningful emblem, or any personalized detail, it shows the thought and care you put into the gift.
Imagine drinking from an engraved glass with a custom design of your choice, enjoying relaxing moments alone or with friends. In this blog, we present the top 5 methods for engraving on glass and explain the necessary tools and the individual steps for each method.

This article contains:
- Method 1: How to engrave on glass with a laser
- Method 2: How to engrave glass by hand (carving)
- Method 3: How to engrave glass with a Dremel
- Method 4: How to engrave glass with the Cricut Maker
- Method 5: How to engrave glass by sandblasting
- FAQs: FAQs about glass engraving and brass plate engraving
Method 1: How to engrave on glass with a laser
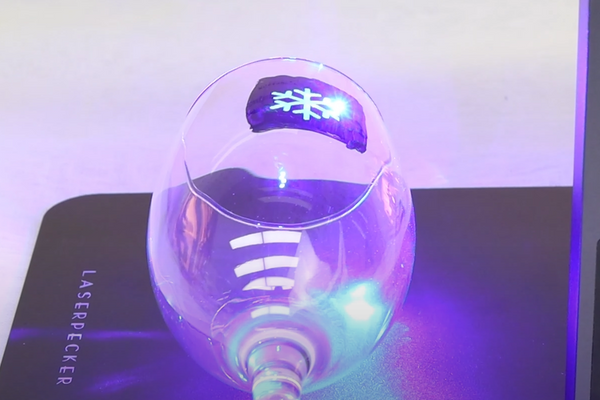
Laser engraving on glass is a high-precision method for etching designs, patterns, text, or images onto glass surfaces using a concentrated laser beam. This versatile technique is used to create personalized glass gifts, decorative items, signage, and much more, as it allows for intricate and detailed results on glass objects.
Tools required for laser engraving on glass
Glass laser engraving machine: A portable yet powerful laser engraving machine like the LaserPecker 4 , specifically designed for processing glass.
Design software: Create or import designs into the LaserPecker engraving machine software to customize them.
Personal Protective Equipment (PPE): Wear safety glasses and a laser safety hood to ensure safety when working with the laser.
Masking materials: Adhesive tape or special masking products to protect certain areas of the glass during engraving.
Cleaning materials: Isopropyl alcohol, microfiber cloths and other cleaning agents for cleaning after engraving.
How does the laser engrave glass?
Step 1 - Design creation or import: Create the desired design using CAD software or import existing designs into the engraving machine's software.
Step 2 - Preparing the Glass: Thoroughly clean the glass surface to ensure there are no particles or residues that could interfere with the engraving process. Apply masking material to protect the areas that should not be engraved.
Step 3 - Setting up the engraving machine: Configure the laser engraving machine with the appropriate settings, including laser power, speed, frequency and focus, depending on the design and type of glass used.
Step 4 - Engraving on Glass: Start the engraving process and ensure the machine precisely follows the specified design to etch it onto the glass surface. Monitor the process to guarantee precision and quality.
Step 5 - Cleaning after engraving: After completing the engraving, remove the covering material and thoroughly clean the glass with isopropyl alcohol or a similar cleaning agent to remove any residue or particles resulting from the engraving process.
Step 6 - Finishing (optional): If desired, apply surface treatments or coatings to improve the appearance or durability of the engraved design.
Video tutorial on laser engraving on glass
Method 2: How to engrave glass by hand (carving)
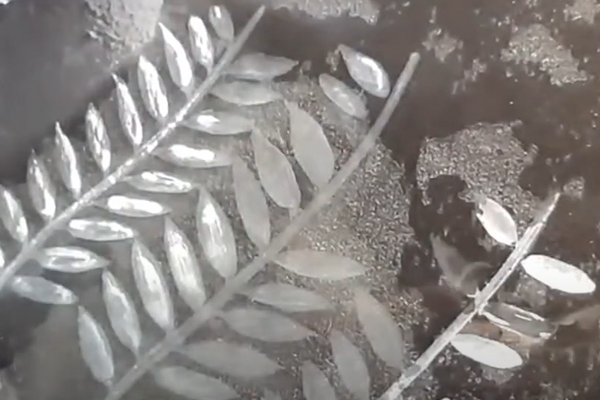
Hand engraving or carving on glass involves using manual tools to etch designs, patterns, or text onto glass surfaces. This traditional method allows for artistic freedom and individual details, resulting in unique and intricate designs on glassware, ornaments, and decorative objects.
Tools required: hand on glass
Diamond burrs: Small, specialized tools with diamond-coated tips used for carving and engraving on glass. They come in various shapes and sizes for different engraving effects.
Vise or rotary tool: Hand-held devices used to hold and maneuver diamond cutters for precise engraving on glass surfaces.
Covering materials: Adhesive tape or protective film to cover areas on the glass that are not intended for engraving, in order to protect them from accidental scratching.
Cleaning agents: Isopropyl alcohol, microfiber cloths or glass cleaner for cleaning the glass before and after engraving.
Personal protective equipment (PPE): Safety glasses and gloves to protect against glass particles and for general safety at work.
How to engrave glass by hand
Step 1 - Design Preparation: Decide on the design to be engraved on the glass and sketch it on paper. This helps visualize the design before you begin the engraving process.
Step 2 - Preparing the glass: Thoroughly clean the glass surface to remove dirt, oil, or residue. Apply masking material to protect the areas not intended for engraving.
Step 3 - Selection of the diamond cutter and tool: Choose the appropriate diamond cutter for the desired engraving effect and insert it into the vise or the turning tool.
Step 4 - Engrave the glass: Using the selected tool and the diamond cutter, carefully and evenly etch the design onto the glass surface. Control the applied pressure to achieve varying depths and levels of detail in the engraving.
Step 5 - Clean the engraved glass: After completing the engraving, remove the covering material and clean the glass surface to remove any residue and particles that may have been created during the engraving process.
Step 6 - Finishing (optional): Optionally, you can apply a protective coating or perform a finishing polish on the engraved area to improve the visibility or durability of the design.
Video tutorial for hand engraving on glass
Method 3: How to engrave glass with a Dremel
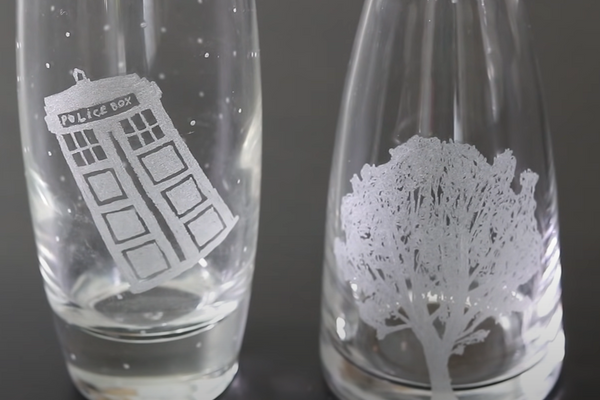
When engraving glass with a Dremel, designs, patterns, or text are etched onto glass surfaces using a rotating tool. The Dremel, a versatile handheld tool with various attachments, allows for precision and control when creating individual and intricate engravings on glassware, mirrors, and decorative items.
Tools required for glass engraving with a Dremel
Dremel rotary tool: A fast, hand-held rotary tool with engraving attachments suitable for glass engraving.
Diamond milling cutters or engraving tips: Special attachments with diamond-coated tips for engraving on glass surfaces.
Covering materials: Adhesive tape or protective film to cover areas on the glass that are not intended for engraving, in order to protect them from accidental scratching.
Cleaning agents: Isopropyl alcohol, microfiber cloths or glass cleaner for cleaning the glass before and after engraving.
Personal Protective Equipment (PPE): Safety glasses and gloves to protect against glass particles and to ensure safety when working with the Dremel.
How to engrave glass with a Dremel
Step 1 - Design preparation:
Determine the design or pattern to be engraved on the glass surface. Create a sketch or template to guide the engraving process.
Step 2 - Preparing the glass:
Thoroughly clean the glass surface to remove dirt, oil, or residue. Apply masking material to protect the areas not intended for engraving.
Step 3 - Selection of the diamond cutter and engraving tips:
Select the appropriate engraving attachment and securely attach it to the Dremel rotary tool.
Step 4 - Engrave the glass:
Use the Dremel tool with the selected engraving bit to carefully and methodically etch the chosen design into the glass surface. Control the tool speed and applied pressure to achieve optimal control and accuracy in creating the desired depth and complexity of the engraving.
Step 5 - Clean the engraved glass:
After completing the engraving process, remove the masking material and thoroughly clean the glass surface. This step ensures that all residues or particles resulting from the etching process are removed.
Step 6 - Fine-tuning (optional):
As a final step, you can apply a protective coating to the engraved area to improve both the visibility and durability of the design.
Video tutorial on engraving on glass with a Dremel
Method 4: How to engrave glass with the Cricut Makers to create items such as vases, mirrors, or glassware.
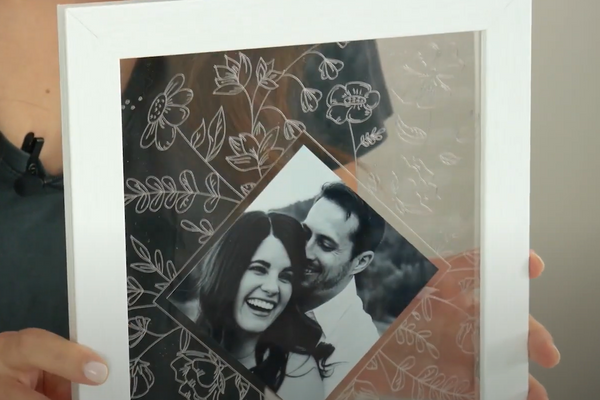
When engraving glass with a Cricut Maker, a special tool, the "engraving tip," is used in conjunction with the Cricut machine to engrave designs, patterns, or text onto glass surfaces. This method offers precision and customization, allowing users to create intricate and personal engravings on various glass objects.
Tools required for glass engraving with the Cricut Maker
Cricut Maker: A cutting machine that supports the use of the engraving tip and is compatible with Design Space software.
Engraving tip: A special tool designed for use with the Cricut Maker to engrave designs onto materials such as glass.
Masking materials: Adhesive tape or film to cover areas on the glass surface that are not intended for engraving, in order to protect them from the etching process.
Cleaning agents: Isopropyl alcohol, microfiber cloths or glass cleaner for cleaning the glass before and after engraving.
Personal protective equipment (PPE): Safety goggles to protect the eyes during the engraving process.
How to engrave glass with Cricut Maker
Step 1 - Design Preparation: Create or select the design or pattern to be engraved using Cricut Design Space software. Ensure the design is compatible with the engraving tip and is the correct size for the glass object.
Step 2 - Preparing the glass: Thoroughly clean the glass surface to remove dust, fingerprints, or any residue that could interfere with the engraving. Cover any areas not intended for engraving with masking material.
Step 3 - Setting up the Cricut Maker: Insert the engraving tip into the Cricut Maker and load the chosen design into the Design Space software by following the included instructions.
Step 4 – Adjust settings: In the Design Space software, adjust the settings for the material (glass) and the engraving tip. Ensure that the correct settings for depth, pressure, and speed are selected to achieve optimal engraving results.
Step 5 - Engrave the glass: Place the prepared glass object on the Cricut Maker's cutting mat and secure it. Start the engraving process so the machine can precisely etch the design onto the glass surface.
Step 6 - Clean the engraved glass: After completing the engraving, carefully remove the covering material and thoroughly clean the glass surface to remove any remaining engraving residue.
Video tutorial on engraving on glass with the Cricut Maker
Method 5: How to engrave glass by sandblasting
Sandblasting is a technique that uses high-speed abrasive media to engrave or etch designs into glass surfaces. This method allows for the creation of precise and intricate details, resulting in matte or textured designs on glassware, windows, mirrors, and other glass objects.
Tools required for sandblasting glass
Sandblasting machine: A device that hurls blasting media such as sand, aluminum oxide or silicon carbide at high pressure onto the glass surface.
Abrasive material: Fine-grained materials used for sandblasting, such as sand or other blasting media suitable for etching glass.
Stencil or masking material: Stencils or masking materials (vinyl, self-adhesive film or special stencils) for covering areas on the glass that are not intended for etching in order to protect them from the abrasive particles.
Air compressor: Supplies the required air pressure to propel the abrasive through the sandblasting machine onto the glass surface.
Personal protective equipment (PPE): Safety goggles, gloves and respirator to protect against abrasive particles and to ensure safety during sandblasting.

How to engrave glass by sandblasting
Step 1 - Creating or selecting the design: Create or select the design or pattern to be engraved onto the glass surface. Convert the design into a stencil or masking format suitable for sandblasting.
Step 2 - Preparing the glass: Clean the glass thoroughly to remove dust, fingerprints, or residue. Apply the stencil or masking material to cover the areas not intended for etching.
Step 3 - Setting up the sandblaster: Fill the sandblaster's hopper with abrasive material. Ensure the unit is connected to the air compressor and adjust the pressure settings as needed.
Step 4 - Glass Engraving: Position the prepared glass object in the sandblasting cabinet or sandblasting area. Use the sandblasting machine to direct the abrasive through the stencil or mask onto the exposed glass surface, creating the desired engraving pattern.
Step 5 - Remove and clean the stencil: Once the engraving is complete, carefully remove the stencil or masking material from the glass surface. Clean the glass thoroughly to remove any grinding residue or particles.
Video tutorial on engraving glass by sandblasting
FAQs about glass engraving
1. Can I engrave colored or tinted glass?
Engraving on colored or tinted glass is possible, but the visibility of the engraving can vary depending on the transparency and color of the glass. Generally, engravings are more visible on clear glass than on heavily tinted or colored glass.
2. Can any type of glass be engraved?
Most types of glass can be engraved, but some are better suited than others. Soda-lime glass, for example, is frequently used because of its composition and transparency. However, tempered glass or extremely thin glass can be more difficult to engrave due to its properties.
3. What types of glass objects can be engraved?
Glass items suitable for engraving include glassware (such as wine glasses, tumblers, and cups), decorative glass pieces, mirrors, windows, awards, ornaments, and much more. Essentially, any glass surface suitable for engraving can be used.
4. How do you engrave glass at home?
Many glass engraving techniques can be done at home with the right tools and safety precautions. Hand engraving, for example with a Dremel, a Cricut Maker, or a mini laser engraving machine , can be carried out in a controlled environment with the appropriate equipment and technique.
Conclusion
In summary, engraving your own glassware at home offers a wide variety of techniques. Preparation, precision, and safety are crucial, especially when it comes to a clean glass surface and proper masking. Practice and patience are key to mastering this craft, and safety precautions must always be observed.
Ultimately, this creative process enables the production of unique, individual pieces that showcase the beauty of engraved glass in various artistic and decorative applications.


