
















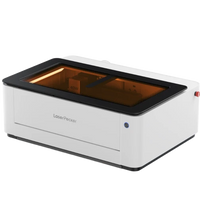
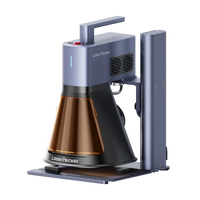


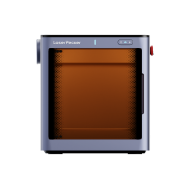























Engraved hip flasks have always represented craftsmanship, celebration, and personal style. An engraving transforms any plain hip flask—whether metal or leather—into a special keepsake, a brand product, or a personalized gift. Thanks to modern compact devices, you can now easily create precise engravings at home.
In this guide, you'll learn about different types of hip flasks, engraving methods, and simple steps to engrave hip flasks yourself.

In this article:
- Part 1: What types of hip flasks are there?
- Part 2: Five methods for engraving hip flasks
- Method 1: Laser engraving
- Method 2: Sandblasting with stencil
- Method 3: Electrochemical etching
- Method 4: Mechanical engraving
- Method 5: Leather hot stamping
- Part 3: How to engrave a hip flask with the LaserPecker LP4
- Part 4: Tips for engraving hip flasks
- Part 5: FAQs about engraving a hip flask
Part 1: What types of hip flasks are there?
Before you get your tools out, you should get to know your hip flask better. The material plays a big role in how it can be engraved.

- Stainless steel hip flasks are particularly popular because they are durable. They look high-quality and are perfect for detailed engravings – for example, text, patterns, or logos. They also do not rust, which means the engraving will look good for a long time.
- Copper and brass hip flasks? They have that classic vintage charm. These metals are softer than stainless steel, making them easier to engrave mechanically or chemically. However, they can tarnish over time if not coated.
- Titanium hip flasks are extremely lightweight and corrosion-resistant – ideal for premium or outdoor models. Engraving them requires suitable tools like fiber lasers.
- Leather-wrapped hip flasks have metal inside and genuine or synthetic leather outside. They are excellent for hot stamping or laser engraving, creating an elegant, textured look. Glass hip flasks are rarer but make great gifts for whiskey or wine. Lasers or sandblasting can create beautiful frosted engravings on them.
Part 2: Five methods for engraving hip flasks
There are several ways to engrave hip flasks. The best method depends on your tools, budget, and desired style. Each method has its own character and advantages.
Method 1: Laser Engraving
Laser engraving is a precise method for customizing hip flasks made from a wide variety of materials mentioned in the previous section. The focused laser beam marks the surface, creating sharp and durable designs.
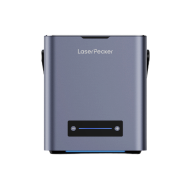
Hip flask engraving machines like the LaserPecker LP4 use dual-laser technology. With an IR laser for metals and a diode laser for materials like leather, the device can process many different surfaces.
Laser engraving ensures clean edges, fine details, and uniform markings – ideal for logos and text. Since the method is non-contact, the hip flask is not scratched. After purchasing a laser engraver, the cost per project is very low, as no additional materials are needed. For private use or small series, this is a fast and efficient solution with professional results.
Method 2: Sandblasting with a Stencil
Sandblasting involves propelling abrasive particles onto a surface through a stencil using compressed air. This etches the exposed areas, creating a matte or frosted finish. This classic method is often used to decorate glass and metal hip flasks, giving them a soft, uniform texture.
This technique gives objects a handcrafted character with a subtle, consistent contrast. It is particularly well-suited for curved or glossy surfaces and ideal for large motifs or patterns. However, each design requires its own stencil, making preparation a bit more time-consuming. Cleaning and masking also add to the effort. This method is therefore less suitable for rapid mass production but perfect for creative craft projects with a handmade look.
Method 3: Electrochemical Etching
In electrochemical etching, also known as chemical marking, an electrical current and a salt electrolyte solution are used to dissolve the metal surface according to a stencil design. This method is often used for nameplates and tools but is also excellent for engraving hip flasks.
The markings are smooth and precise. Depending on the electrolyte solution and voltage used, they can appear light or dark. This method works particularly well on stainless steel, titanium, and other electrically conductive metals. While the cost per piece is relatively low, caution is advised when handling chemicals and stencils. This technique is excellent for logos or serial numbers but offers less creative freedom than laser engraving.
Method 4: Mechanical Engraving
Mechanical engraving uses a rotating cutter or a diamond tool to cut into the material. This creates a tactile indentation with the classic look of a traditional engraving. On metal hip flasks, deep and clear markings can be created – ideal for striking lettering or monograms.
However, the hip flask must be securely clamped, and processing curved surfaces can be difficult, potentially leading to uneven results. Additionally, tools wear out over time, and vibrations can affect fine details. The method is robust and visually appealing but slower than laser engraving and less suitable for larger quantities. It is particularly well-suited for traditional, artisanal designs where engraving depth is important.
Method 5: Leather Hot Stamping
Hot stamping gives leather-wrapped hip flasks a refined, textured surface. This involves pressing a heated metal stamp or a laser onto the leather surface. The leather is slightly darkened and gains additional depth, creating a high-quality, handmade look.
Modern laser devices like the LP4 can create this effect without the need for special stamps. The heat from the laser slightly burns the leather, creating detailed designs, logos, or initials that stand out particularly well. The result is elegant, durable, and perfect for personalized gifts or wedding favors. Hot stamping combines artisanal quality with efficiency, making it ideal for soft materials that are difficult to process mechanically.
| Method | Suitable Material & Application | Precision | Cost & Production Time | Batch Production |
|---|---|---|---|---|
| Laser Engraving | Metal, Leather, Coated Surfaces | ★★★★★ | Low long-term costs | Excellent |
| Sandblasting | Metal, Glass | ★★★ | Medium | Limited |
| Electrochemical Etching | Metal (Stainless Steel, Titanium) | ★★★ | Low unit costs | Good |
| Mechanical Engraving | Metal (flat surfaces) | ★★★★ | High setup cost | Moderate |
| Leather Hot Stamping | Leather coverings or soft materials | ★★★★ | Low | Very Good |
Laser engraving is one of the best methods for engraving hip flasks because it is precise, clean, and suitable for many materials like metal and leather. It requires little maintenance and saves costs in the long run. For these reasons, it is excellent for both private projects and business applications.
Part 3: How to engrave a hip flask with the LaserPecker LP4
Engraving a hip flask with the LaserPecker LP4 is easy and fun. The LP4 is suitable for both metal and leather, as it features fiber and diode laser modules.
Step 1: Prepare the design
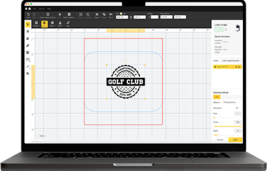
Create your logo, initials, or design using software like LaserPecker Design Space, Illustrator, or Canva. Then save the file in a compatible format such as SVG or PNG.
Step 2: Prepare the hip flask
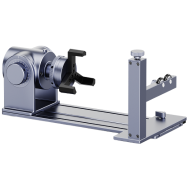
Place the hip flask on a flat and stable surface. For curved hip flasks, you can use a rotary module (optionally available for the LP4) to ensure the laser remains correctly focused.
Step 3: Adjust settings
Select the appropriate laser module – IR laser for metal and diode laser for leather. Adjust power and speed according to the hip flask's material. For stainless steel, medium power at a lower speed is recommended to create a dark engraving without damaging the surface.
Step 4: Test first
First, test the engraving on a similar material or an inconspicuous spot to ensure that the settings and engraving depth are correct.
Step 5: Start engraving
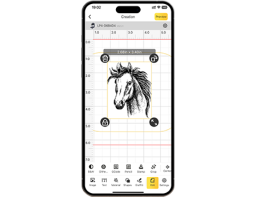
When everything is ready, start the process in the LaserPecker app. The LP4 will engrave your design precisely and cleanly onto the surface. You can watch as the motif appears clearly, detailed, and permanently on the hip flask.
Step 6: Cleaning
After engraving, wipe the hip flask with a soft cloth to remove any residue. Now you have a personalized hip flask – perfect as a gift or collector's item.
The LP4's dual laser system (IR + diode) makes it a rare all-in-one engraving machine, allowing creators to easily work on both metal and leather surfaces without switching machines.
Part 4: Tips for engraving hip flasks
- First, clean the hip flask with alcohol to remove any grease or fingerprints.
- If your hip flask is round, use holders or a rotary module to ensure the laser remains correctly focused.
- Start with low laser power and gradually increase it to avoid unwanted marks.
- Optionally use masking tape to check your design before engraving.
- For leather-wrapped hip flasks, you can engrave both the metal and the leather to achieve a particularly high-quality look.
Part 5: FAQs about engraving hip flasks
1. Fiber laser vs. CO₂ laser: Which laser is better?
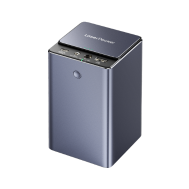
If you want to engrave hip flasks, a fiber laser is the best choice – ideal for metals like stainless steel, titanium, and brass. For leather and wood, a CO₂ laser is excellent – as is a 450 nm blue diode laser. However, if you want to engrave a wide range of materials – from metal to wood, plastic, and leather, to glass – then the LP5 is the ideal solution. It combines a 20W fiber laser with a 20W diode laser, offering power and versatility for almost any engraving project – all in one compact machine.
2. Do I need marking spray for engraving stainless steel?
No – at least not if you're using an IR laser. Such sprays are usually used with CO₂ lasers to help them mark shiny metal better. IR lasers like the LP4 can engrave stainless steel directly, without spray. This saves time and cost.
3. What is the best method for engraving stainless steel?
Fiber laser engraving is the best choice. It creates clean and durable markings by altering the metal surface without deep cuts. The result is a dark, smooth engraving that is resistant to wear, water, and rust. Since laser engraving is non-contact, there are no scratches or deformations to the hip flask. This method is particularly well-suited for fine lettering, company logos, or QR codes.
4. Can you engrave a whiskey bottle?
Absolutely! With a 450 nm blue diode laser, you can engrave directly onto glass whiskey bottles. Simply apply a layer of masking paper or black marker to the glass beforehand – this helps the laser absorb better and creates clear, frosted engravings.
The laser engraver creates fine and durable textures without damaging the bottle. Always ensure the bottle is empty, clean, and securely positioned before you begin engraving. Personalized whiskey bottles make excellent wedding gifts, holiday keepsakes, or corporate presents – turning an ordinary bottle into a unique memento.
Conclusion
Engraving a hip flask means more than just adding a name or a design – it's a way to create something personal and meaningful. Whether you choose traditional methods like sandblasting and etching or prefer modern laser engraving, each technique offers its own style and character.
Among all these methods, laser engraving particularly stands out due to its precision, speed, and the ability to realize detailed designs on a wide variety of materials. With devices like the LaserPecker LP4, practically anyone can transform an ordinary flask into a unique memento or a thoughtful gift.
Regardless of the chosen method, you should take your time planning the design, testing materials, and engaging in the creative process – your individually engraved flask is guaranteed to become a special piece that you'll love to keep or give as a gift.