























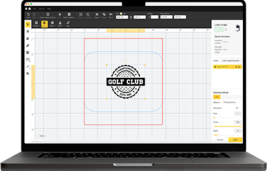
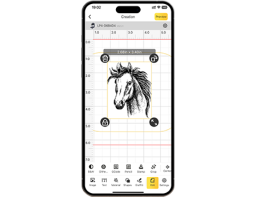


















Personalized cutting boards are far more than just practical kitchen helpers: They make thoughtful gifts, decorative unique pieces, and an expression of one's own personality. Whether it's a family recipe immortalized on wood, a custom wedding gift, or a cutting board with a company logo for a small business – they combine functionality with personal meaning and create lasting memories.
In this guide, you will learn how to personalize a cutting board and achieve an appealing, durable result with professional tips. Whether you enjoy getting creative yourself or want to build a small business: here you will find everything you need for your individual cutting board.

In this article:
- Part 1: Choosing the Right Cutting Board for Personalization
- Part 2: The Four Best Methods for Personalizing a Cutting Board
- Method 1: Laser Engraving
- Method 2: Wood Burning (Pyrography)
- Method 3: Stencil and Paint
- Method 4: Carving and Filling (Inlay)
- Part 3: Pro Tips for the Perfect Personalized Cutting Board
- Part 4: Frequently Asked Questions about Personalized Cutting Boards
Part 1: Choosing the Right Cutting Board for Personalization
When choosing a suitable cutting board, both aesthetics and durability play an important role. Pay attention to the following points:
- Wood Type: Hardwoods such as maple, walnut, and cherry engrave well and are particularly durable.
- Surface: A smooth, cleanly sanded surface is ideal. Unevenness can distort the design.
- Purpose: For decorative boards, the engraving can be larger. Cutting boards for daily use require a food-safe seal.
- Grain and Color: On light wood, engravings are usually clearly visible, while dark wood types create an elegant contrast.
Once you have selected the appropriate board, you can choose the method that best suits your design.
Part 2: The Four Best Methods for Personalizing a Cutting Board
Below, we present four popular methods. They differ in appearance, feel, and the required craftsmanship.
Method 1: Laser Engraving – for a Flawless, Professional Result
Laser engraving is a precise and fast way to professionally personalize a cutting board. A focused beam of light from the laser engraver etches the design into the wood surface, creating clean, permanent markings.

This method is suitable for both private projects and small businesses, as it allows for consistent results in a short amount of time. The engraving is easy to maintain and, with proper after-treatment, food-safe – ideal for boards that will actually be used.
What you need for laser engraving
- A dual laser engraver like the LP4 or a comparable device.
- A clean, smoothly sanded cutting board.
- A design file in vector format or a high-resolution image.
- Protective masking tape (optional).
Why the LP4 is a good choice
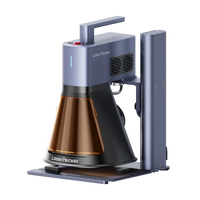
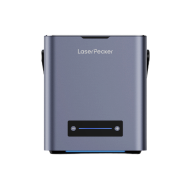
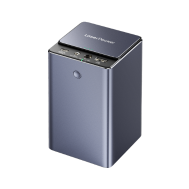
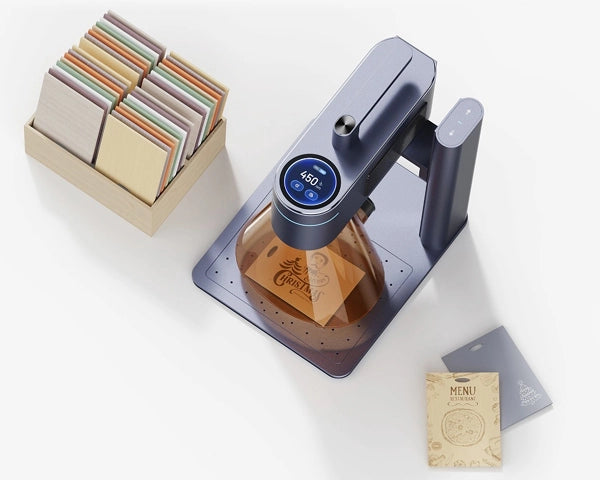
The LP4 Dual Laser Engraver is excellent for this task. It features two lasers: a 10W diode laser with 450nm and a 2W infrared laser with 1064nm. This allows it to process over 300 materials, including wood, bamboo, coated items, and even metal. These advantages make the LP4 a good choice:
- Precise and fast: It engraves at speeds up to 4,000 mm/s and delivers clear 8K resolution.
- Two lasers for numerous applications: Switch between blue and IR lasers to work on wood and coated surfaces.
- Easy operation: The touchscreen simplifies setup; designs can also be easily repeated.
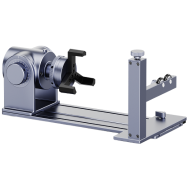
- Flexible working angles: Even thick or curved workpieces can be processed without tedious repositioning of the board.
- High-quality results: Ideal for gifts, company logos, or decorative home accessories.
Step-by-step: How to laser engrave a cutting board
- Step 1. Prepare your design: Create your design in vector graphics software or import a logo file.
- Step 2. Position the board: Place the cutting board flat on the engraving surface.
- Step 3. Select laser: For wood, choose the 450nm diode laser.
- Step 4. Adjust power and speed: For harder wood types, a medium power and higher speed are generally suitable.
- Step 5. Check preview: Use the preview to check the position and alignment of the design.
- Step 6. Start engraving: Begin the engraving process and let the laser realize the design.
- Step 7. Clean and seal: Remove residues and then apply food-safe mineral oil to protect the wood and give it a well-maintained finish.
Method 2: Wood Burning (Pyrography)
Wood burning gives a cutting board a warm, handcrafted look. The design is burned directly into the wood with the heated tip of a wood-burning tool.
Advantages and disadvantages of wood burning
Advantages:
- The method creates a warm, traditional look.
- You only need a few simple and inexpensive tools.
- It is well suited for creative unique pieces and small quantities.
Disadvantages:
- Good results require a steady hand, practice, and patience.
- The result can vary depending on the hardness of the wood.
- This method is less suitable for detailed logos.
When is wood burning useful?
This method is suitable for handmade gifts and designs with a traditional character, such as monograms, family names, or simple floral patterns.
Method 3: Stencil and Paint
With stencils and acrylic or food-safe paint, individual, colorful designs can be created.
Advantages and disadvantages of stencils and paint
Advantages:
- The technique is easy to learn even for beginners.
- It offers a wide range of colors.
- It is suitable for DIY projects and seasonal decorations.
Disadvantages:
- Paint can fade or peel with repeated cleaning.
- Only food-safe paint may be used for surfaces that come into contact with food.
- An additional sealant is required to protect the design.
When are stencils and paint suitable?
This technique is primarily recommended for decorative display pieces or thematic gifts that do not come into direct contact with food.
Method 4: Carving and Filling (Inlay)
With this technique, depressions are made in the wood by hand or with a CNC router. They are then filled with resin or another type of wood to create a distinct contrast.
Advantages and disadvantages of carving and inlay work
Advantages:
- The technique creates an attractive texture and visible depth.
- It allows for a high-quality, durable surface.
- It is excellent for extraordinary unique pieces.
Disadvantages:
- Processing requires special tools and a lot of time.
- The resin used must be suitable for food contact.
- The finished pieces are heavier and more costly to produce.
When are carving and inlay work suitable?
This method is ideal for family heirlooms, anniversary gifts, or particularly high-quality brand products.
| Method | Precision | Durability | Required Skills | Color Options | Best Suited For |
|---|---|---|---|---|---|
| Laser Engraving (LP4) | ★★★★★ | ★★★★★ | Medium | Limited | Professional and durable designs |
| Wood Burning | ★★★★☆ | ★★★★☆ | High | Limited | Rustic, handmade projects |
| Stencil & Paint | ★★★☆☆ | ★★☆☆☆ | Easy | Extensive | Decorative cutting boards |
| Carving & Filling (Inlay) | ★★★★★ | ★★★★★ | High | Medium | High-quality heirlooms and gifts |
In summary, each method has its strengths, but laser engraving particularly stands out for its precision, repeatability, and durability. Whether you want to make a single gift or larger quantities: Laser engravers for wood like the LaserPecker LP4 enable professional results at home or in the workshop.
Part 3: Pro Tips for the Perfect Personalized Cutting Board
Tip 1: Start with High-Quality Hardwood
For the best result, choose a sturdy, smooth wood like maple, walnut, or cherry. These types of wood engrave cleanly and are very durable.
Tip 2: Mask the Engraving Area
Protect the area around the design with masking tape. This helps prevent smoke marks and keeps the edges clean.
Tip 3: Always Perform a Test First
Always test the settings on a scrap piece of the same wood type. Adjust speed, power, and focus until the desired result is achieved.
Tip 4: Seal Properly
After engraving, apply food-safe oil or beeswax to protect the design and the wood. This ensures the cutting board remains suitable for food and the engraving stands out better.
Tip 5: Care for the Board Carefully
Clean the board gently with warm water and mild dish soap, then dry it immediately. Do not soak it or put it in the dishwasher, as this can cause the wood to swell and crack. Regular oiling maintains the beautiful surface.
Part 4: Frequently Asked Questions about Personalized Cutting Boards
1. Can a cutting board be safely engraved?
Yes. A professionally executed laser engraving does not affect the stability or function of the cutting board. Afterward, treat the wood with food-safe mineral oil or beeswax to protect the engraving and surface long-term.
2. Is laser engraving or wood burning better?
Wood burning creates a rustic, handmade look but requires practice. Laser engraving offers significantly higher precision, clean lines, and reproducible results – ideal for names, logos, and delicate designs.
3. How do I care for and clean a personalized cutting board?
Clean the board by hand with warm water and mild dish soap. Dry it immediately and regularly treat the wood with mineral oil or beeswax to keep the engraving and wood beautiful for a long time.
4. How much does it cost to personalize a cutting board?
Depending on the design and method, costs typically range between 30 and 100 Euros. For those who regularly produce custom cutting boards, a laser engraver can save time and money in the long run.
5. Which wood is best for a personalized cutting board?
Hardwoods like maple, walnut, or cherry are particularly durable and yield clean engraving results. Softer woods like pine are less suitable, as they burn more easily and absorb moisture more readily.
Conclusion
A personalized cutting board is more than a simple kitchen item: it tells personal stories and offers space for creative design. From traditional wood burning to detailed engraving, various methods are available for different styles.
If precision, speed, and durability are crucial, laser engraving with a device like the LP4 Dual Laser Engraver is particularly convincing. It combines modern technology with creative craftsmanship and enables individual pieces that bring long-lasting joy.