












































Custom foam inserts are ideal for securely and neatly storing tools, electronics, collectibles, and equipment. They protect delicate items, prevent shifting during transport, and ensure storage cases look clean and professional. Whether for a hobby project or a small business, custom foam inserts make organization significantly easier.
In this guide, we'll show you how to make custom foam inserts at home, compare the pros and cons of different methods, and explain step-by-step how to achieve professional results with laser cutting.

In this article:
- Part 1: Five Common Methods for Making Custom Foam Inserts
- Method 1: Tracing and Manual Cutting (DIY Method)
- Method 2: Pour-in-Place Foam / Foam Molding
- Method 3: Pick-and-Pluck Foam (Pre-cut)
- Method 4: CNC Foam Cutting
- Method 5: Laser Cutting Foam Inserts
- Part 2: How to Make Custom Foam Inserts with Laser Cutting
- Part 3: Six Important Tips for Laser-Cut Foam Inserts
- Part 4: FAQs about Making Custom Foam Inserts
Part 1: Five Common Methods for Making Custom Foam Inserts
Custom foam inserts are often used to protect tools, equipment, and products during storage and transport. From simple DIY solutions to professional manufacturing, there are various ways to produce foam inserts – each with its own advantages and limitations. Below are five of the most commonly used methods today.
Method 1: Tracing and Manual Cutting (DIY Method)
This is the simplest method. You place the object on the foam, trace its contours with a marker, and then cut out the shape with a utility knife or hot wire cutter.
This method is inexpensive and easily accessible, making it popular among hobbyists and for single projects. However, results depend heavily on manual skill, and achieving clean edges or uniform depth can be challenging.
Method 2: Pour-in-Place Foam / Foam Molding
Liquid foam is poured into a mold or case and expands around the item as it cures. This creates a custom-fit insert, often used for shipping delicate or irregularly shaped objects.
While this method offers excellent protection, it is often messy, time-consuming, and not reusable once the contents change.
Method 3: Pick-and-Pluck Foam (Pre-cut)
Pick-and-pluck foam is pre-cut into small cubes that can be removed by hand. It's a quick, tool-free solution often found in camera cases and toolboxes.
The method is fast and beginner-friendly, but precision is limited, and edges often appear rough – especially for detailed or professional presentations.
Method 4: CNC Foam Cutting
CNC machines use rotating tools to mill foam into precise shapes and depths. This method is particularly suitable for thicker foam and industrial applications.
It delivers consistent results, but setup time is longer, machines are large, and fine details or tight corners are more difficult to achieve.
Method 5: Laser Cutting Foam Inserts
Laser cutting uses a focused laser beam to cut foam with high accuracy and clean edges. This method is ideal for custom layouts, logos, tight tolerances, and series production.
Compared to other methods, laser cutting offers unparalleled precision, excellent repeatability, and a professional finish – making it the top choice for businesses and advanced makers.
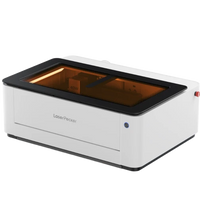
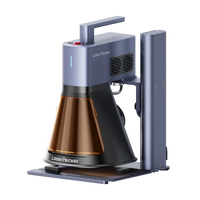
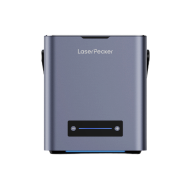
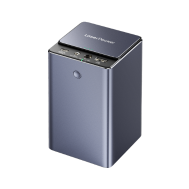
Furthermore, laser cutting is excellently suited for complex designs and repeated productions. Machines like the LP4 dual-laser engraver are highly versatile and work with both soft and rigid foams with high detail and speed.
| Feature | Tracing & Manual Cutting | CNC Cutting | Laser Cutting (LP4) |
|---|---|---|---|
| Precision | Low | High | Extremely High |
| Repeatability | Poor | High | Perfect |
| Production Speed | Slow | Medium | Very Fast |
| Skill Required | Low | High | Low to Medium |
| Cost | Minimal | High | Medium |
| Best Use | Single DIY Projects | Complex Series Production | Professional or Detailed Inserts |
| Foam Thickness | Thin to Medium | Thin to Thick | Thin to Thick, Multi-layer Designs Possible |
Which Method is Best for You?
Laser cutting offers the perfect balance of flexibility and utmost precision in manufacturing foam inserts. Forget the tedious work with hand tools or imprecise pick-and-pluck methods. With this technique, you get a custom-fit insert for your items every time. Compared to CNC cutting, foam laser cutters are often faster for thin or medium-thick foam. Furthermore, they produce significantly cleaner edges, requiring less post-processing after cutting.
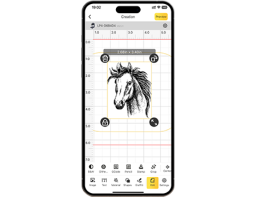
The LP4 dual-laser engraver represents a real advancement for laser cutting foam. It features a 10W diode laser and a 2W IR laser, allowing it to precisely cut various types of foam. Angles can be adjusted flexibly, and engravings are done at high speed (up to 4000 mm/s), making it ideal for the rapid production of larger quantities of inserts. Even beginners can use it without problems. With software like LaserPecker Design Space or LightBurn, detailed designs can be created and then precisely replicated without errors.
Part 2: How to Make Custom Foam Inserts with Laser Cutting
Producing foam inserts with a laser cutter is efficient, highly repeatable, and offers excellent control over the design. Below is a detailed guide using the LP4 dual-laser system.
Materials Needed
Before you begin, prepare the following items:
- Foam sheets suitable for laser cutting. EVA, polyethylene, or polyurethane foam are good options.
- Software to control your laser cutter. LightBurn and LaserPecker Design Space are two possible programs.
- A digital file of your cut design, correctly set up with the appropriate spacing and desired depth.
- Safety first! Use gloves, safety glasses, and ensure good ventilation.
- If you want to keep the foam surface clean, you can use masking tape to prevent burn marks on the surface.
Steps for Making Custom Foam Inserts with the LP4
Step 1: Plan the Design
Start by creating a digital design in your preferred software. Place all items on a grid, leaving enough space between them to keep the foam stable.
Step 2: Perform a Test Cut
Before cutting your main design, test a small cutout on a scrap piece of foam. This allows you to check the laser's power, speed, and cutting depth. Adjust the settings until you achieve clean cuts without melting or burn marks.
Step 3: Prepare the Laser Cutter
Place the foam sheet into the LP4. Set the laser to the correct height and focus it using the dual-laser system. Select the appropriate laser module based on the foam thickness.
Step 4: Cut the Foam
Start the cutting process. If you need multiple layers, cut them individually and then stack them. The LP4 works with extreme precision, giving you smooth edges and exact dimensions.
Step 5: Remove and Inspect
After cutting, carefully remove the foam insert. Test whether each item fits perfectly into its recess and trim any rough edges if necessary. The final result should fit perfectly and have clean, neat edges.
Part 3: Six Important Tips for Laser-Cut Custom Foam Inserts
1. Leave Sufficient Space Between Objects
Ensure you leave 2–3 mm of space between each recess to prevent cracks or damage.
2. Use Multi-Layer Cutting for Better Depth Control
When working with thick foam, it's best to cut it in multiple layers. The layers can then be stacked to achieve a clean result.
3. Always Make a Small Test Cut First
Always test your settings on a small scrap piece of foam first. This prevents material waste and uneven cuts.
4. Avoid Overly Thin or Pointed Shapes
Very thin areas can melt or break during cutting. Rounded corners provide more stability.
5. Add Finger Cutouts or Grab Areas
Add small cutouts to make it easier to remove items from the foam.
6. Use Engraved Labels or Areas
Laser engravings are excellent for adding permanent labels to the foam and facilitating organization.
Part 4: FAQs About Making Custom Foam Inserts
1. How Thick Should Foam Be for Tool Inserts?
The appropriate foam thickness depends on what will be stored inside. Thin foam works well for small items like electronics or pens. However, for heavy or delicate tools, you should use thicker foam.
The LP4 can cut multiple layers to achieve precisely the desired depth. This allows for both thin and thick inserts with clean edges. Multi-layer inserts also provide better cushioning for delicate items, preventing them from shifting during transport or storage. With the right depth, everything fits perfectly.
2. Can You Laser Cut EVA Foam?
Yes, EVA foam is excellent for laser cutting. Simply adjust the laser's speed and power to the material's thickness. The LP4 features a dual-laser system and air assist, which reduces burn marks and achieves consistent, clean cuts.
EVA foam can also be easily engraved and cut, allowing you to add labels, logos, or designs directly to the insert. This creates custom storage solutions with a professional look.
3. What Foam is Best for Cutting?
EVA, polyethylene, and polyurethane foam are the best options. You should avoid very soft or highly flammable foams unless your laser system has good ventilation and flame protection features.
The LP4 offers strong air assist, ensuring cuts are always safe and clean. The right foam also prevents deformation or tearing with frequent use – especially important for inserts holding heavy or sharp tools. With the appropriate material, your inserts will remain durable and dimensionally stable.
4. How Much Do Custom Foam Inserts Cost?
Costs depend on the foam type, thickness, and cutting method used. Manual cutting or pick-and-pluck foam are inexpensive but require a lot of labor. CNC and laser cutting have higher initial costs but save time and reduce material waste. That's why the LP4 is particularly economical if you produce many inserts. Considering the time savings, low error rate, and consistently precise results, laser-cut foam is definitely worthwhile. Plus, less material is wasted, which saves costs in the long run.
Conclusion
Custom foam inserts are great for better storage, more protection, and a professional presentation. There are various manufacturing methods, but laser cutting – especially with a machine like the LP4 Dual-Laser Engraver – is extremely fast, precise, and reliable. The LP4 features two laser modules, supports engraving from different angles, and works with design software, making it ideal for various foam types, complex designs, and larger production volumes.
With the LP4, you can:
- Cleanly cut and engrave various foam thicknesses.
- Achieve clean edges and professional precision.
- Reproduce the same project repeatedly with consistent quality.
- Easily create more inserts with minimal setup using smart software.
With a laser cutter like the LaserPecker LP4, your foam layouts will look consistent, efficient, and professional – whether you're producing a single insert or a larger series. If you want to improve your tool organization, collectible storage, or product presentation, laser cutting is the best choice in 2026.