Metal engraving is an art that combines craftsmanship with precision. From custom jewelry to industrial applications, mastering this technique opens up a world of creative possibilities.
In this comprehensive guide, we'll introduce you to how to engrave metal . Whether you're a beginner learning a new skill or an experienced artisan looking to refine your techniques, our step-by-step instructions, tips, and insights will help you master the intricate process of metal engraving.

In this article:
Method 1: Laser engraving of metal
Tools required for laser engraving metal
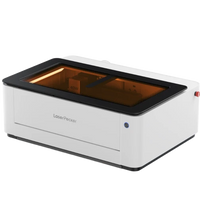
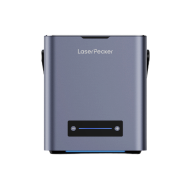
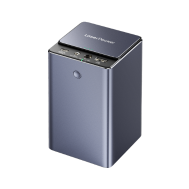
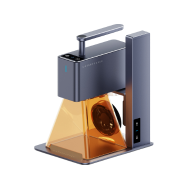
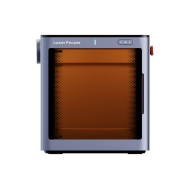
- Laser engraving machine: : Specially designed for laser engraving metal .
- Computer design software : For creating or importing designs for engraving.
- Metal workpiece : Suitable metal material suitable for laser engraving.
- Protective equipment: Laser safety goggles to protect the eyes from the laser beam.
- Cover material: Used to protect areas of the metal surface from the laser engraving process.
- Ventilation system: Ensures proper ventilation and the removal of fumes or deposits generated during engraving.
How to laser engrave metal?
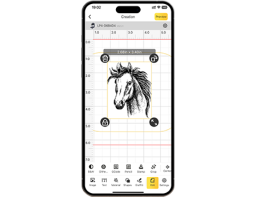
- Design preparation: Create or import the design into software compatible with the laser engraving machine.
- Setting up the workpiece: Place the metal workpiece securely in the laser engraving machine.
- Calibration: Calibrate the laser settings (power, speed, frequency) based on the metal type and desired engraving depth.
- Masking application: Apply masking material to the areas you do not want to engrave to protect them from the laser beam.
- Start engraving: Start the engraving process using the software. The laser follows the specified design, removing material and creating the engraved pattern.
- Post-processing: After engraving is complete, remove the masking material and clean the engraved surface of any deposits and residues.
Tips for laser engraving metal
- Material compatibility: Make sure the metal you use is suitable for laser engraving and does not emit harmful fumes.
- Consider covers: Install covers to protect the areas not intended for engraving.
- Test engraving: Perform test runs on a similar piece of metal to fine-tune settings and verify the design before engraving the final piece.
- Safety Precautions: Always wear appropriate laser safety goggles and follow safety protocols when operating the laser engraving machine.
- Maintenance: Regularly clean the lenses and components of the laser engraver to ensure optimal performance.
Method 2: Hand engraving of metal (carving)
Tools required for hand engraving metal
- Engraving tool (graver): There are different shapes and sizes for different effects.
- Metal vise: For securely holding the metal piece during engraving.
- Magnifying glasses: Help with precision work in detail.
- Layout tools: Rulers, markers, and scribers for transferring designs to the metal.
- Protective equipment: Safety goggles to protect the eyes from metal shavings.
How do you engrave metal by hand?
- Prepare the metal: clamp it in the vise and clean the surface thoroughly.
- Transfer design: Transfer your chosen design onto the metal using a scriber or marker.
- Hold and use the engraving tool: Hold the engraving stylus like a pencil. Start with light strokes and increase pressure as needed. Experiment with different stylus shapes and sizes to achieve different effects.
- Practice control: Achieve consistency and precision in your strokes. Experiment with line thicknesses and textures by adjusting pressure and stroke techniques.
- Finishing and cleaning: After engraving, clean the metal surface to remove impurities and polish it for better visibility.
Tips for hand engraving metal
- Start simple: Start with simple designs before moving on to more complex designs.
- Patience and practice: Engraving takes time and practice to master. Be patient and keep practicing to improve your skills.
- Experiment: Try different burin shapes, stroke techniques, and depths to create unique effects.
- Safety first: Always wear safety goggles to protect your eyes from metal shavings.
Method 3: Rotary engraving of metal (Dremel)
Tools required for rotary engraving of metal
- Rotary tool (e.g. Dremel): Select suitable bits for engraving metal.
- Metal vise or clamp: To secure the metal piece during engraving.
- Protective equipment: Safety goggles and dust mask for protection.
- Engraving bits: Carbide or diamond-tipped bits for metal engraving.
- Cleaning supplies: rags for wiping up deposits and a brush for cleaning metal shavings.
How do you engrave metal with a Dremel?
- Prepare the metal: Clamp it in a vise or clamp and make sure it is stable.
- Select the engraving insert: Select the appropriate engraving insert for metal and insert it into the rotary tool.
- Mark your design: Transfer your design to the metal surface using a marker or scriber.
- Engraving process: Hold the Dremel like a pencil and begin engraving at a steady speed and light pressure. Follow your marked design, adjusting the pressure for different line depths.
- Control and precision: Practice controlling the Dremel to achieve the desired depth and style of engraving. Keep a steady hand for clean lines.
- Clean the engraved area: Use a brush and cloth to remove metal shavings and contaminants from the engraved area.
Tips for rotary engraving metal
- Bit selection: Use the right metal engraving bits to achieve clean and precise lines.
- Practice on scrap metal: Before engraving your final piece, you should practice on scrap metal to familiarize yourself with the tool and technique.
- Safety precautions: Wear safety goggles and a dust mask to protect yourself from metal shavings and dust.
- Pressure: Keep speed and pressure constant to achieve smooth and controlled engraving.
- Experiment and refine: Experiment with different chisel shapes and depths to achieve different textures and effects.
Method 4: Cricut Metal Engraving
Tools needed for Cricut metal engraving
- Cricut Maker: Specially equipped with the engraving tip.
- Metal engraving sheets: Thin metal sheets compatible for engraving with Cricut.
- StrongGrip Mat: To hold the metal sheet firmly in place during engraving.
- Engraving tip: Specially designed for the Cricut Maker machine.
- Design software: Cricut-compatible software for creating or importing designs.
- Cleaning agent: Cloth for removing residues after engraving.
How do you engrave metal with the Cricut Maker?
- Prepare your design: Create or import your design using the Cricut Design Space software. Make sure the design fits the dimensions of the sheet.
- Attach the metal sheet: Place the metal sheet on the StrongGrip mat and make sure it is firmly in place so that it does not move during engraving.
- Insert the engraving tip: Insert the engraving tip into the Cricut Maker, following the manufacturer's instructions.
- Load the design and engrave: Follow the instructions in Cricut Design Space to select the engraving design and settings. Place the mat in the machine and begin engraving. The Cricut Maker will automatically engrave the design onto the metal sheet.
- Removal and Cleaning: Once the engraving is complete, carefully remove the metal plate from the mat. Use a cloth to clean the engraved area of any dirt and residue.
Tips for Cricut metal engraving
- Choose the right metal: Make sure the metal plates you use are compatible with the Cricut engraving process.
- Design considerations: Choose designs that match the capabilities of the engraving tip to achieve clear and defined engravings.
- Secure placement: Make sure the metal plate is securely attached to the StrongGrip mat to prevent slipping during engraving.
- Test on scrap metal: Before engraving your final design, you should perform a test on a small piece of the same metal to ensure that the settings and design work as intended.
- Regular Maintenance: Clean the device and engraving tip regularly to ensure optimal performance and longevity.
Method 5: CNC engraving of metal
Tools required for CNC metal engraving:
- CNC machine: Specially equipped for metal engraving.
- Computer with CAD/CAM software: For designing and creating toolpaths for engraving.
- Metal workpiece: Suitable metal material for CNC engraving.
- Engraving bits: Carbide or diamond-tipped bits for metal engraving.
- Tool holders and collets: For securely holding the engraving tools.
- Coolant or lubricant: For cooling and lubrication during the engraving process.
- Protective equipment: safety glasses and hearing protection.
How to engrave metal with a CNC machine?
- Prepare the design: Create or import the design into CAD/CAM software. Generate toolpaths specifying the depth, speed, and tool changes required for engraving.
- Setting up the workpiece: Clamp the metal workpiece securely on the CNC machine bed to prevent movement during engraving.
- Tool selection and installation: Select the appropriate engraving tool and insert it into the spindle of the CNC machine using the appropriate collet or tool holder.
- Set CNC parameters: Enter the required parameters (speed, depth, feed) into the CNC machine based on the material and design specifications.
- Start the engraving program: Start the CNC machine and run the engraving program. Monitor the process to ensure accuracy and make any necessary adjustments.
- Cleaning and inspection: After engraving, remove the metal workpiece from the CNC machine. Clean the engraved area of any contaminants and coolant/lubricant residues.
Tips for CNC engraving metal
- Proper fixation: Ensure that the metal workpiece is securely fastened to prevent movement during engraving that could affect precision.
- Toolpath optimization: Optimize toolpaths in CAD/CAM software for efficient and accurate engraving.
- Coolant/Lubricant Control: Maintain adequate coolant/lubricant to prevent overheating and extend tool life.
- Tool inspection: Regularly check engraving bits for wear. Replace them as needed to maintain high-quality engraving.
- Test on scrap material: Before engraving the final piece, remember to test on a metal scrap piece to fine-tune settings and check the design.
FAQs about metal engraving
Q1. What types of metals can be engraved?
Various metals can be engraved, including stainless steel, aluminum, brass, copper, silver, gold, and others. However, the hardness and composition of the metal can affect the engraving process and the result.
Q2. Which engraving methods are suitable for different metal types?
Hand engraving, rotary engraving, CNC engraving, and laser engraving are all viable methods for engraving various metal types. The choice often depends on the desired precision, complexity, and surface hardness of the metal.
Q3. Is it possible to engrave on coated or plated metals?
Engraving on coated or plated metals is possible, but it's important to consider the thickness and composition of the coating. Engraving could compromise the integrity of the coating and potentially reveal the underlying metal.
Q4. Can detailed designs or photos be engraved on metal?
Yes, detailed designs, logos, text, and even photos can be engraved on metal using high-precision engraving processes such as CNC or laser engraving. These processes allow for the creation of intricate and complex designs.
Q5. How deep can metal be engraved?
The depth of metal engraving depends on the engraving method, the type of metal, and the intended use. Hand engraving typically produces shallower engravings, while CNC or laser engraving allows for deeper, more precise cuts.
Q6. Can I engrave on curved or irregularly shaped metal surfaces?
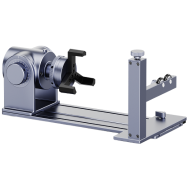
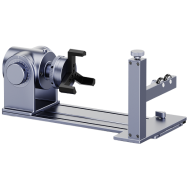
Engraving on curved or irregular surfaces can be challenging, but is possible with specialized equipment such as rotary engraving machines or laser engravers with rotary attachments designed for such surfaces.
Q7. Are there limits to the size of metal that can be engraved?
Engraving machines have specific workable areas, and the size of the metal that can be engraved depends on the machine's capabilities. However, larger pieces may require specialized machines or multiple setups for a complete engraving.
Q8. How durable are metal engravings?
Metal engravings, especially those created using processes like CNC or laser engraving, are generally very durable. The depth and technique used can affect the longevity of the engraving. For example, deeper engravings are more resistant to wear and fading.
Q9. Can I engrave metal at home?
Yes, depending on the method chosen, some metal engraving techniques can be performed at home with the appropriate tools and equipment. However, certain processes, such as CNC engraving, require professional machines.
Q10. Is there a difference between engraving and etching on metal?
Engraving typically involves cutting or removing material from the metal surface to create a pattern or text. Etching, on the other hand, often uses chemical or laser processes to create designs by altering the metal surface without removing material.
conclusion
In summary, metal engraving is a versatile art that offers several methods for creating intricate designs, text, and patterns on various types of metal. Whether traditional hand engraving for artistic finesse, using rotary or CNC machines for precision, or laser engraving for intricate details, each method offers unique advantages and applications.
Due to their durability and versatility, metal engraving is ideal for personalized items, industrial lettering, artistic expression, and much more. By understanding the tools, techniques, and limitations of each process, you can achieve professional and lasting metal engraving results for a variety of purposes.


