Personalized rings have always held a special emotional value—whether engraved with a meaningful date, initials, or a symbolic motif. An engraving transforms a simple ring into a unique keepsake. Thanks to modern technology, there are now various ways to engrave a ring yourself.
How do you engrave a ring? In this article, we'll show you four popular and practical methods for engraving a ring. Whether you're a DIY enthusiast or a professional jeweler, you'll find a suitable solution here. From precise laser engraving to classic hand engraving: Here's how it works!

In this article:
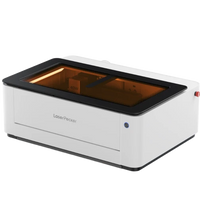
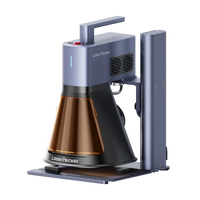
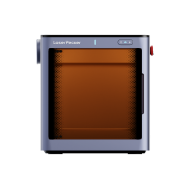
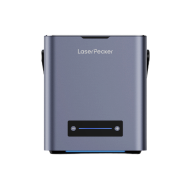
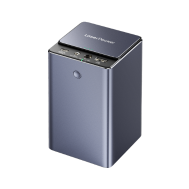
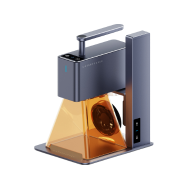
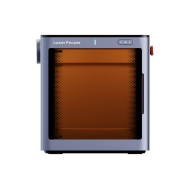
Method 1: Ring engraving with a laser machine
Tools & equipment for laser engraving a ring:
-
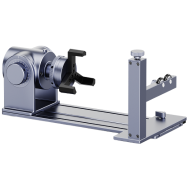
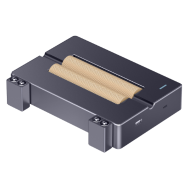
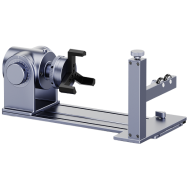
Laser machine (ideally with a rotation axis for cylindrical objects such as rings)
Fiber laser: Best suited for metals such as gold, silver, stainless steel or titanium
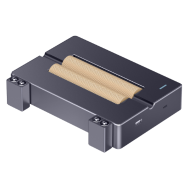
Diode laser: More commonly used for wood, acrylic or coated rings - Rotation axis or ring holder: Allows smooth rotation of the ring during engraving.
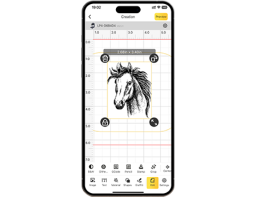
- Design software (e.g. LightBurn or the LaserPecker Software & App )
Steps for ring engraving with a laser machine:
Step 1: Prepare the engraving design
Create or import your text, symbol, or pattern into the software. Adjust the size precisely to the ring's engraving area and select the appropriate engraving mode (e.g., outline or fill).
Step 2: Fix the ring correctly
Insert the ring into the rotation axis or ring holder. Make sure it's firmly seated and centered to prevent slipping during rotation.
Step 3: Adjust laser settings
Choose the appropriate laser power, engraving speed, and frequency depending on the ring material. Use preview or outline mode to check the exact position.
Step 4: Test engraving (recommended)
Test engrave on an old ring or in an inconspicuous area to check the settings.
Step 5: Start engraving
Start the engraving process and watch it carefully. Make sure the ring rotates evenly—this will ensure a precise and clean engraving.
Step 6: Clean the ring
After engraving, you can clean the ring with a soft cloth or alcohol wipes to remove any dust or oxidation residue.
Advantages and disadvantages of ring engraving with fiber or infrared laser:
Advantages:
- Highest precision engraving
- Non-contact process: No pressure or mechanical damage to the ring
- Ideal for complex designs, logos, patterns or even photos
- Suitable for many materials: metal, wood, acrylic, ceramic, leather
Disadvantages:
- Some training time in software and laser settings required
Method 2: Ring engraving with engraving pen or rotary tool
This method is ideal for anyone who enjoys getting creative. Whether as a personalized gift or as a DIY project, with a little patience and the right tools, you can create impressive ring engravings by hand.
Required tools & materials:
- Rotary tool (e.g. Dremel) or manual engraving pen
- Diamond or carbide engraving tips (especially for metal rings)
- Vice or ring holder (to fix the ring)
- Polishing cloth or metal polish (for post-processing, optional)
Steps to engrave a ring with a rotary tool:
Step 1: Fix the ring
Carefully clamp the ring into a vise or ring holder. Make sure it's secure but not too tightly clamped to avoid scratches or deformation.
Step 2: Sketch the design
Lightly draw your design or desired text onto the ring with a fine marker or pencil. Alternatively, you can use a stencil or self-adhesive pattern to ensure clean lines.
Step 3: Select engraving tip
Choose a fine tip that matches the material of your ring. Diamond-coated or carbide tips are particularly suitable for metal.
Step 4: Start engraving
Turn on the rotary tool or start with the engraving pen. Guide the tip over your design with a steady hand. Work with light, even pressure—it's better to lightly go over a line several times than to apply too much force at once.
Step 5: Clean and rework
After engraving, remove any dust or marker residue and polish the surface with a soft cloth or polishing compound if necessary.
Advantages and disadvantages of engraving a ring with a rotary tool:
Advantages:
- Cheaper than laser or CNC engraving
- Portable and flexible
- Ideal for individual ideas for ring engravings
- Works on various materials: metal, wood, acrylic, ceramic, leather
Disadvantages:
- More prone to errors – especially if the hand slips
- Engraving depth may be uneven
- Takes longer than automated processes
Method 3: Engrave the ring by hand with a chisel and hammer
This traditional method of ring engraving has been used in jewelry making for centuries and requires sensitivity and patience. It's ideal for anyone who appreciates craftsmanship and wants to personalize a ring with genuine handcraft.
Required tools & materials:
- Engraving chisels or engraving styluses (fine hand tools for metal)
- Small hammer (ideally a jackhammer)
- Ring holder or engraving block (to fix the ring)
- Magnifying glass or jeweler's loupe (for precise work)
This is how traditional hand engraving works:
Step 1: Fix the ring
Securely clamp the ring in a ring holder, vise, or engraving block. Stability is crucial to prevent the ring from moving during engraving.
Step 2: Mark the design
Transfer your desired motif onto the ring surface using a fine marker, a scribing tool, or a template. For beginners, it's recommended to start with simple shapes or letters; more complex ring engraving ideas can be implemented later with practice.
Step 3: Position the tool
Hold the chisel or engraving tool at an angle of approximately 30–45°. Use your dominant hand to guide the hammer, while using the other hand to stabilize the engraving tool.
Step 4: Start engraving
Gently tap the engraving tool with the hammer and slowly follow your design line. For curves or fine details, you should rotate the ring or use a rotating engraving block.
Step 5: Clean & Rework
After engraving, gently wipe the ring with a soft cloth. For more contrast and a smooth finish, you can also use a metal polish.
Advantages and disadvantages of engraving a ring with a chisel and hammer
Advantages:
- Traditional craftsmanship with lasting value
- Deeper and permanent engravings
- No software or power required
- Ideal for individual and artistic ring engravings
Disadvantages:
- High training effort
- Mistakes cannot be undone
- Time-consuming
- Not ideal for very small rings or delicate details without experience
This method is aimed at anyone who loves craftsmanship and values genuine handcrafting. Whether as a gift or for a personalized design, manual engraving makes each ring truly unique. Those with patience and practice can create particularly artistic and intricate ring engravings with this technique.
Method 4: Engrave a ring with a jewelry CNC machine
CNC ring engraving is a modern and highly precise method that is particularly popular with professional jewelers and small manufacturers who require precise and repeatable ring engravings.
Required tools & equipment:
- Jewelry CNC engraving machine (typically 3-axis or 4-axis system)
- CAD compatible design software
- Ring holder or chuck for secure fixation of the ring
- Engraving cutter or tool head, suitable for metal
- Coolant or air supply system (optional, for clean engraving results)
Steps to engrave a ring with a CNC machine:
Step 1: Create or import a design
Use CAD software to design your desired motif, such as text, patterns, logos, or symbols. Make sure the design fits the curvature and width of the ring. The design is then converted into toolpaths and exported as G-code.
Step 2: Prepare the CNC machine
Insert the appropriate engraving cutter and set the spindle speed. Securely secure the ring in the holder or chuck to prevent it from moving during engraving. Load the G-code file into the CNC machine via the control software.
Step 3: Adjust machine settings
Determine the origin point, usually in the center and on top of the ring. Adjust the feed rate, engraving depth, and speed to the ring material. Perform a dry run without engraving to check alignment.
Step 4: Engrave the ring
Start the engraving process and monitor the machine during the process. Pay particular attention to smooth movement, especially if a rotating axis is used for 360° engraving.
Step 5: Cleaning and polishing
After engraving, remove any dust and metal shavings. If necessary, polish the engraved surface to achieve a clear and shiny finish.
Advantages and disadvantages of engraving a ring with a CNC jewelry machine
Advantages:
- High precision and consistent quality
- Perfect for series production and individual customization in small batches
- Suitable for many metal types: gold, silver, steel, titanium
Disadvantages:
- High acquisition costs for machines and software
- Requires knowledge of CAD/CAM software
- Longer preparation time compared to laser engraving
- Rather unsuitable for individual pieces, unless you work regularly with CNC technology
Conclusion:
Ring engraving can be as simple or as complex as you like—it all depends on your tools, your skill level, and the desired result. Laser and CNC machines offer speed and precision, while rotary tools and hand engraving allow you full creative control and a personal touch.
Whether you're creating a unique gift or starting a custom jewelry business, each of the methods presented in this guide will open up a wealth of ring engraving ideas and creative possibilities. Choose the technique that best suits your goals and start engraving rings that truly tell a story.


