









































Cake Toppers? They are an easy way to elevate any cake – whether for a birthday party, a wedding, or simply a special occasion. Just place them on the cake, and it instantly becomes an eye-catcher that perfectly matches the theme.
With laser cutting, you can easily create individual designs that look elegant, professional, and significantly more precise than handmade versions. Delicate lettering, fine shapes, and detailed patterns – all of this is possible thanks to the high precision of a laser.
In this guide, we'll show you the best materials for laser-cut cake toppers, provide you with a step-by-step guide, and explain why laser cutting is the best method for creating your own unique cake toppers.

In this article:
Part 1: Materials and Tools for Laser Cutting a Cake Topper
Before you start, make sure you have everything prepared: the right material, a ready-to-use laser cutter, functional design software, and the appropriate safety equipment.
Materials (Acrylic and Wood)
For cake toppers, acrylic and wood are best:
Acrylic: It's available in almost any color – transparent, mirrored, or with a glitter effect. It's lightweight and food-safe. Acrylic provides a clean, modern look.

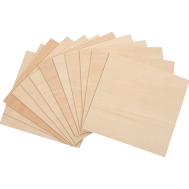
Wood: Materials like basswood or birch plywood are excellent. Wood gives the cake topper a natural, rustic style that perfectly suits weddings or vintage parties. After cutting, the wood can be painted or stained to enhance its appearance.

Required Tools
Here's what you need for laser cutting a cake topper:
- Laser Cutter: The most important tool for clean and precise cuts.
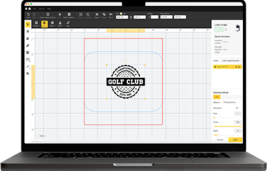
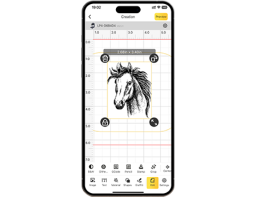
- Design Software: Use LightBurn, Adobe Illustrator, or LaserPecker Design Space to create your designs.
- Safety Equipment: Always wear safety glasses when working with lasers and ensure good ventilation.
- Cutting Accessories: Use clamps, honeycomb panels, and tape to keep the material flat during cutting and achieve optimal results.
Part 2: Step-by-Step Guide for a Laser-Cut Cake Topper
Now it's time to laser-cut your cake topper. Here's how to make your own cake topper:
1. Create Design
Create your cake topper design using design software. Most people use lettering like "Happy Birthday" or names and complement them with hearts, stars, or flowers. Also, add a stick or a base so that the topper can later be inserted into the cake. Save your design as a vector file (SVG, DXF, or AI), as laser cutters require these formats for precise cuts.
2. Select Material
Choose wood or acrylic depending on the desired style. If you are using acrylic, first remove the protective film. Wood should be lightly sanded to ensure a smooth surface. Then place the material on the laser cutter bed.
3. Set up Laser Cutter
Adjust power, speed, and focus according to the material thickness. First, test the settings on a scrap piece to ensure clean edges and prevent burn marks.
4. Engrave and Cut
Begin by engraving patterns, dates, or initials into the material. Afterward, the shape of the cake topper is cut out. This order ensures that details remain sharp and edges look clean.
5. Post-processing
Remove any protective films, smooth the edges of acrylic, or paint/stain the wood. Finally, clean the cake topper so it can safely come into contact with the cake.
Part 3: Why Laser Cutting Surpasses Other Methods for Making Cake Toppers
DIY cake toppers are often made with tools like Cricut or entirely by hand. But laser cutting? That simply offers some real advantages:
Extremely precise and detailed
Laser cutters enable incredibly fine cuts and engravings. Small lettering, delicate ornaments, or decorative frames – things that are often difficult with blades or when cutting by hand.
Clean Edges
Laser-cut acrylic or wood usually has smooth and clean edges directly. This means you have significantly less sanding or post-processing to do. Scissors or blades, on the other hand, often leave rough edges that require additional work.
Ideal for Layered Designs and Complex Projects
Laser cutting is excellent for multi-layered designs. Cutting out shapes, adding additional layers, and creating decorative engravings – all of this is possible in one workflow. Layering materials with a Cricut or by hand often takes longer and makes precise alignment, gluing, and preventing deformation more difficult.
Fast and Repeatable
Once the correct settings are found, a laser cutter can produce the same design identically over and over again. This is ideal for producing larger quantities. With Cricut devices or manual work, however, small differences often arise. Furthermore, laser engraving is significantly faster than manual decoration or embossing.
Compatible with More Materials
Laser cutters can process materials that are more difficult for Cricut tools, such as thicker plastics, wood, or multi-layered materials. This results in significantly more creative possibilities.
Less Effort
The laser process is digitally controlled, which means less manual work is required, fewer errors occur, and post-processing is also reduced. Less sanding, fewer corrections, and overall a cleaner result.
For all these reasons, many makers prefer laser cutting for cake toppers – especially when they want high-quality, clean, and consistent results that go beyond simple standard shapes.
Part 4: Recommended Laser Cutter for Cake Topper Projects
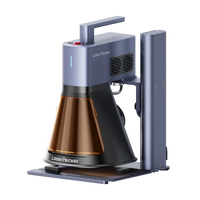
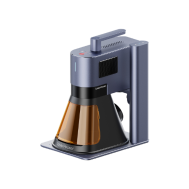
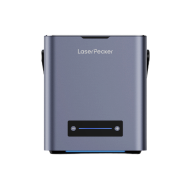
If you want to make cake toppers with a laser cutter, the LaserPecker LP5 is definitely worth considering.
It features two lasers – a 20W diode laser and a 20W fiber laser. This allows it to both cut and engrave. The diode laser is excellent for cutting wood and acrylic (up to 15–20 mm thick) and ensures cake toppers with smooth edges.
The LP5 can engrave fine details. You can add elegant floral patterns, monograms, or decorative frames to your cake toppers.
In addition, it engraves extremely fast (up to 10,000 mm/s). This allows you to produce many cake toppers in a short time without losing detail quality.
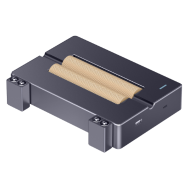
Do you need a larger work area? Then you can add the Slide Extension. This allows you to cut larger designs (up to 160 × 300 mm) – ideal for oversized cake toppers or multiple designs at once.
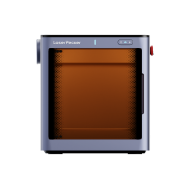
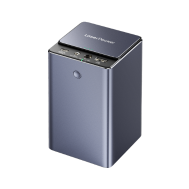
The LP5 is also safe for indoor use. It is compact and portable. In combination with the safety enclosure, it becomes a Class 1 laser device, making it safe for home or classroom use.
Thanks to its performance, speed, and safety features, the LP5 is an excellent choice for hobbyists, event planners, or small businesses who want to create custom cake toppers.
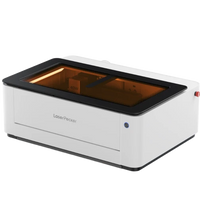
Alternatively, you can also opt for the LaserPecker LX2. With powerful 20W/40W/60W diode laser options, it is specially designed to effortlessly cut larger materials – making it the perfect choice for extensive cake topper projects.
Part 5: FAQs on Laser Cutting Cake Toppers
1. Acrylic or Wood Cake Topper – Which is better?
Both acrylic and wooden cake toppers can make your cake look great – but which option is better depends on the desired style. Acrylic is extremely versatile, available in many colors, and easy to clean – perfect for birthdays or parties. Wood, on the other hand, provides a natural or elegant look that works particularly well for weddings or vintage celebrations. Also pay attention to appearance, material thickness, and weight. For delicate designs, acrylic is particularly suitable as it is lightweight and easy to cut. Wood, on the other hand, appears more stable and can be individually painted or stained.
2. Is it safe to use laser-cut cake toppers on food?
Yes, as long as you follow some safety rules. Acrylic or untreated wood are fine if only the stick part touches the cake. If you want to be extra careful, you can also wrap the stick with food-safe tape or insert it into a straw. Don't forget to remove dust or residues from cutting before use.
3. Can I add small details?
Of course! Laser cutters are excellent for precise details and fine lettering. However, the elements should not be too thin, otherwise they could break when inserted into the cake. You can also combine several acrylic layers or connect wood and acrylic – this creates striking and stable designs.
4. Can I reuse my cake topper?
Definitely! Acrylic cake toppers are very robust and easy to clean, making them perfect for multiple celebrations. Wooden toppers require a little more care but can also be reused or kept as a keepsake. A protective layer of varnish helps to keep the wood beautiful for longer and protect it from damage during storage.
Conclusion
Laser-cut cake toppers make every celebration more personal and special. With the right tools, you can create custom decorations for weddings, birthdays, and many other occasions yourself. An LP5 laser cutter makes the entire process fast and precise. This allows creative ideas to be implemented much more easily and with greater detail than with manual work.
Whether you want to make a cake topper for a friend's cake or sell decorations – laser cutting offers countless possibilities for impressive designs. You can create monograms, names, motifs, and patterns. Thanks to its easy operation and high accuracy, you can try out different designs and offer individual customizations. Whether as an addition to homemade cakes or as a product for your own business – a laser cutter is a versatile tool. With a little practice, you can create cake toppers that perfectly match any occasion and make every celebration even more special.